


Bonding to Metal with epoxy
Bonding metals & plastics to Fiberglass or Carbon Fiber composites
While such a bond will never be close to the full strength of the metal or even to the plastic you are attaching, there are steps one can take to significantly improve on a simple lap joint. Particularly for thin metal, such bonds can exceed most other 'once common' attachments such as rivets, spot welds or even bolts, because the bond area is far greater. But when attaching to a heavier mass of metal structure, the connection needs help.
So lets look at two examples that will cover some original preparation methods. Options that may open your mind for other ideas on how you might improve your own demanding joints.
Case 1
First, you might have a thrust washer to bond to composite fibers that you want to prevent turning under load, such as under the beak at the hounds on a rotating mast. Such a washer could be S/S, bronze or even a tough plastic.
Such unique bonds need their surfaces to be specially prepared and then need an added 'quasi-physical' shear resistance that will combine with the resin bond to strengthen the end result.
First, both surfaces need to be very well cleaned, with the part to add (washer) first being wiped with acetone to remove any oily film that may have been used during its creation. This can even apply to the plastic, though just a quick wipe in this case. Slightly dissolving a plastic underside surface is not all bad in this case, but just use acetone sparingly.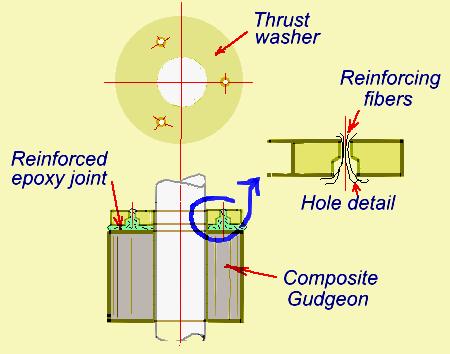
Next, roughen the bond surface with sand or emery paper.
Now to create some additional physical resistance to rotation.
With a washer, drill 3 very small holes (4 if the washer has a hole over 1/2” (12) dia). Use these holes to drill a larger hole (6mm) just half way through the washer. (See enlargement on sketch). The small pilot holes only need to be 1/16” (1.5mm) as they are just there to vent the space as epoxy is later pushed in.
The next step is to slightly heat the washer. Pre-heat an oven up to 180F (for metal) or 160F (for plastic), with a small piece of plywood on the typical oven's wire shelf. Then turn the oven OFF and place your washer (or other part) on the plywood and close the oven. While the part warms, mix a little epoxy and add in just a few short pieces of fiber to the mix. After a 10 min warm up, remove the plywood and brush or paste your epoxy mix on to the underside of the (washer or part) and then return the part to the cooling oven and leave it to cure. (I do not recommend to ever having the oven actively ON with epoxied parts inside … the local heat burst can be too much).
Once cured, your washer will now have a well bonded epoxy coating on its underside that will bond much better to your FG or CF composite, as its now ‘epoxy to epoxy’. Just drill out the holes again and lightly flat-sand off before bonding and clamping in place. (Of course, if not using peel ply over the curing surface, lightly scrub it with soapy water to remove the amine blush before bonding it to anything else).
The 6mm indents allow the creation of mini-towers of epoxy to physically resist rotation and these can be strengthened by feeding some FG or CF fibers through the holes, before adding the epoxy that will bond them.
Case 2
Another even more challenging application using the same principles, is when highly loaded metal hinges are mounded on to a composite like fiberglass. (This used to be the case with the folding system for the W17 until fiberglass hinges were developed that made hinge mounting far more compatible).
But the metal mount DID work, as long as the proper preparation was undertaken. Although this is covered in more detail in this article on Hardware Mounting, its basically as for the washer above.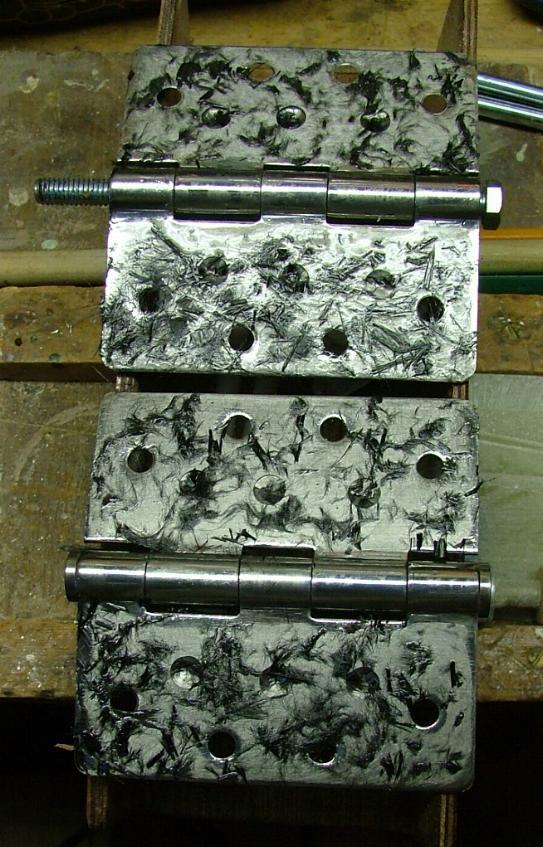
Ie: cleaning the metal surface and then adding epoxy (reinforced with short CF fibers in this case) to a pre cleaned and heated surface, so that a far ‘rougher & tougher’ bonding surface is created. (See photo at right)
I am actually still testing the success of this procedure as my own boat still uses polished S/S metal hinges; but they have not moved at all in 10 years of service and considering the boat was once flipped over to crash upside down on a stony beach that must have highly stressed the joint, I am very impressed with the result.
So yes, its worth taking the extra hour to do a really clinical job on such joints, as they are inherently weak. The ‘heating, sanding and warm bonding’, also seems to help when epoxy bonding to difficult plastics such as polyethylene, but remember that the bond can still not be much better than the shear strength of the bonding resin, although some physical roughness will increase the effective area working for you.
In the case of epoxy, the resin shear rating can still vary a lot, depending on the type of epoxy .. from 800-3200 lbs.sqin in fact .. a 4:1 ratio! (divide by 145 for mPa's) But if using a strong epoxy common for boat work, I consider 1500 lbs/sqin a reasonable conservative working value, to which a safety factor would then still be applied. If you really need a higher value for a specific job, consider a toughened epoxy from 3M such as their 3M™ Scotch-Weld™ Epoxy Adhesive DP920 .. but a call to 3M might be worth the effort anyway, as new adhesives are being created all the time and 3M is well up on these.
=====================================================================
While on the subject of bonding metals with epoxy, I would like to share with you a couple of sketches and a quote from a White Paper published a few years back by 3M, an acknowledged leader in the field, as you may find the information useful. 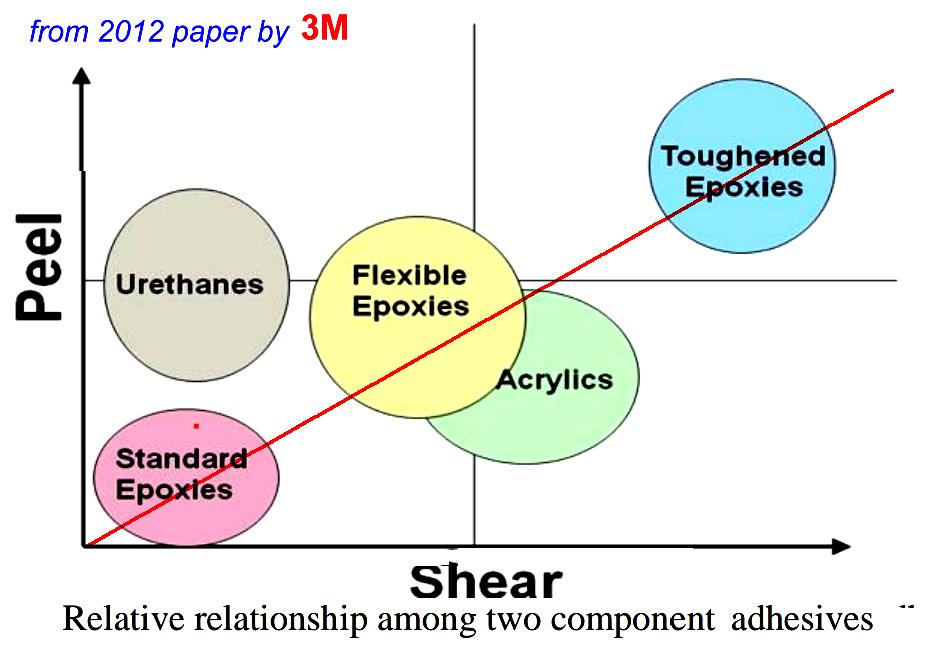
First, a diagram of relative shear & peel strengths that again confirms the very wide range of epoxies and where other bonding materials fit in. The standard epoxy at the lower left would be the type of general-use epoxy sold in tubes at a hardware store. The latest toughened epoxies are 4 times stronger, with the acrylics also performing well ... though less so in peel strength.
The general trend also confirms that glue PEEL strength is even weaker than its SHEAR strength., and this leads to the following interesting diagram.
When joining thin metal sheets to each other, (mind you, not something we generally need to do on a boat), there are several ways to make such a joint. Many, as shown here in the upper part of this sketch, will really challenge the low peel strength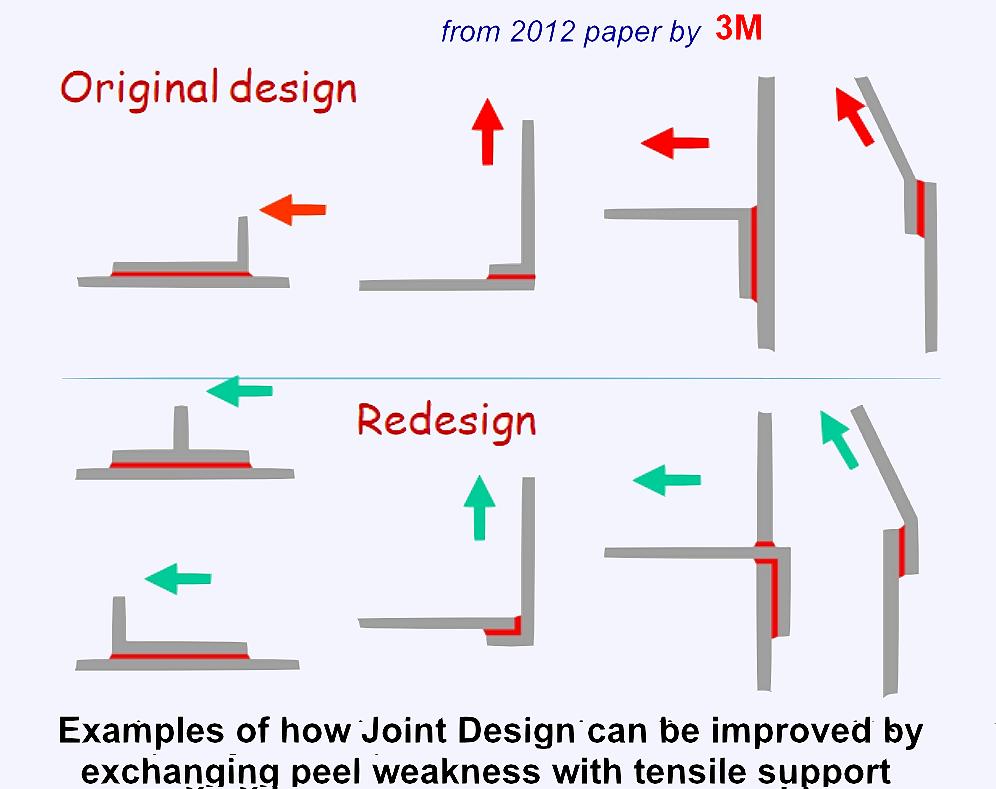 of a glue. But in the lower half, the sketch demonstrates how a small change at the lap joint can create a joint where the parts are now partly 'hooked' together physically, so that the joint can now be held in place mostly by the glue working in shear. This creates a far stronger joint yet uses no extra material, so is of similar weight. Such joints (for thin sheet materials) are not only much stronger than rivets, screws or tack welds, but can even match or exceed the strength of full welds.
Its just a good example that there is a poor or a better way of doing things, if we only take a moment to think how the joint will actually work in practice.
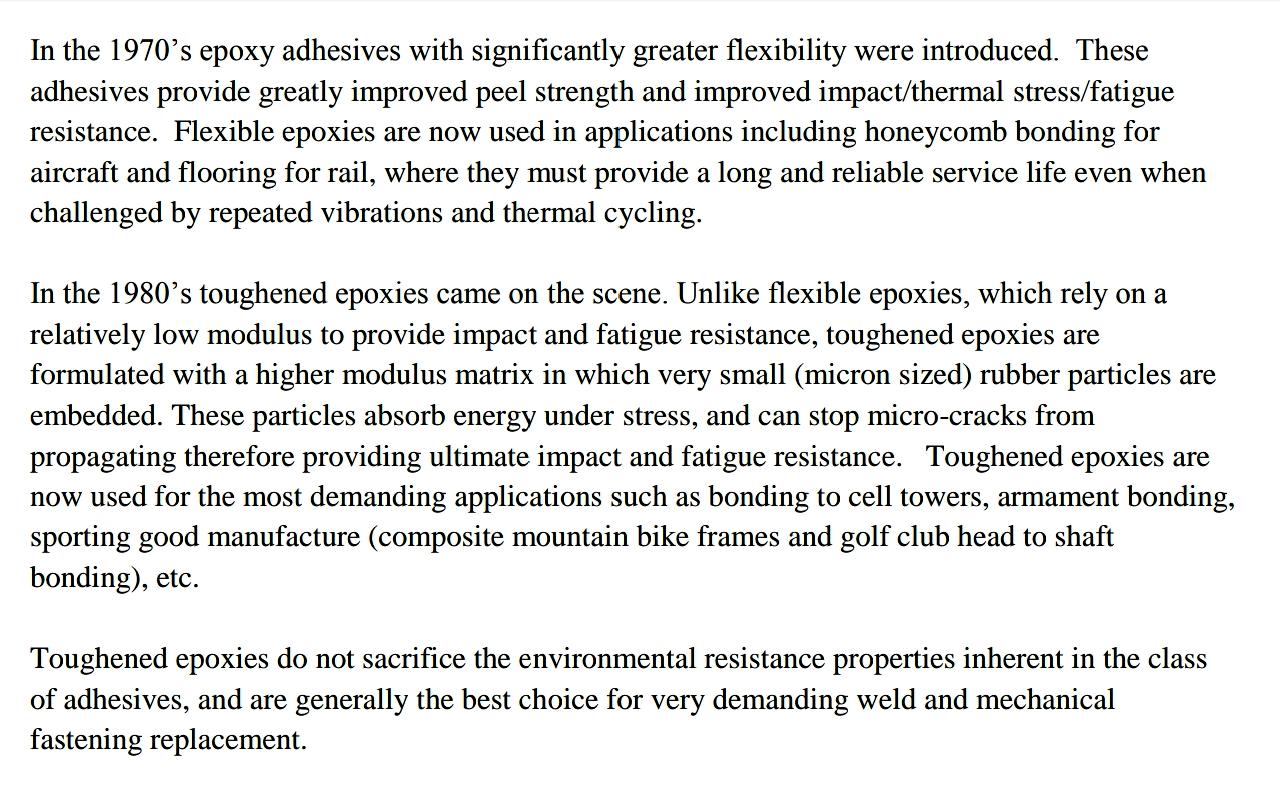
To close, I will share with you an excerpt from the 3M article that describes the development of epoxies over time, something that continues to this day.
If anyone has a specific need to bond sheet metal-to-metal, the full 3M article may be helpful, so here is a link to it.
two-part-epoxy-adhesive-performance-vs-mechanical-fasteners-white-paper-uk-signature.pdf
GO here, to find more Construction Tips & Techniques.
"New articles, comments and references will be added periodically as new questions are answered and other info comes in relative to this subject, so you're invited to revisit and participate." —webmaster
"See the Copyright Information & Legal Disclaimer page for copyright info and use of ANY part of this text or article"