

.
.
.
.
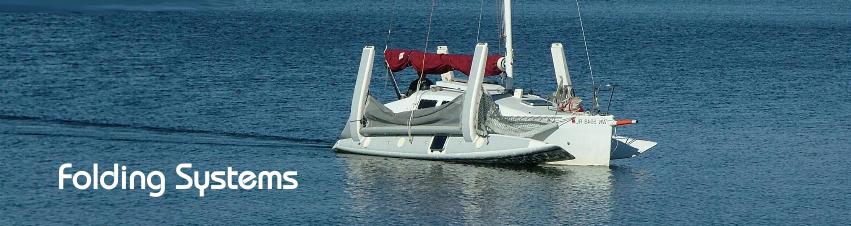
Latest Development to open W17 amas alone
..... without needing to step up into the cockpit December 2022
It’s clear that occasionally, one may need to open (or close) the folding AMAS of the Gull-Wing W17 when there is no help in sight. While is takes barely 2 minutes to do this with a helper, there are times and situations when some other solution would be great, even if using 2 persons will always be the preferred and faster way.
I first addressed this issue back in 2012, and by creating a ‘half-way prop’ it became possible to do this alone, but it did involve climbing into the cockpit for each ama. See here ‘Folding Amas Alone 2012’
But with the folded amas lowered as far as practical (for low windage and best stability on the road) there was not a lot of space between them unless you were pretty slim, and if you added an exterior gunwale on the ama for trapezing foot comfort as I did, even a slim person had insufficient space.
So a concept has now been developed that does not need someone in the cockpit and this will inevitably be of interest to the older or less athletic individual.
To get there, I experimented with a couple of derrick designs and the chosen one detailed here proved the most stable. Details of the derrick and beam are given on this sketch.
 Before even starting, there are THREE important things to get right. First, the boat must be on nearly level ground .. or more precisely, the main beam must be level If not, the operating angle of the derrick will change as will the center of gravity of each raised ama and this can cause some serious instability that must be avoided. So first, level the amas and boat to within +/- about 1” (25) transversely. Placing a small spirit level on the main beam would be a good way to achieve this.
Secondly, the main boat MUST be braced with secured posts to the ground under at least the main (forward) beam .. or alternatively, have tight straps to the trailer from the beam ends. This is to prevent the main hull changing angle during the lifting operation, as lifting one ama up and over, changes the centers of gravity significantly, tending to incline the boat a few degrees. This could destabilize the prop support of the ama during the operation.
Finally, check that there are no ropes or other obstacles laying over the beams by the hinge, that would prevent the akas to fold together. Ropes are obvious but if you have installed say an oarlock holder for sculling, that may foul with the outer block for the mainsheet traveller, requiring that it be repositioned about 100mm inboard along the track. So please take care of those three things each time you fold or unfold, to avoid an unnecessary hiccup or accident.
Here is a sketch of the gantry with dimensions that work, without being excessively high.

As setting up the system for the first time requires access to the ama to attach the rope strop, I will start with folding the Ama IN. I will also add, that because I will try to give you all the details, why’s & wherefore’s, this will indeed take much longer to read than doing the actual lift!
The first requirement is a sturdy (rope or webbing) strop around the ama, located just aft of the main beam …. at the center of weight. Tests showed it was much preferable to lift the ama up from OUTSIDE of the ama, as then the lifting lever arm is the highest. This requires a strop that will not slide around the ama, but is fixed in some way and an easy way to achieve that was to use a mooring cleat that I had previously mounted above the deck edge. just 300mm aft of the main beam.
(My cleats are solidly mounted with 2.5” x 3/16” S/S machine screws set in epoxy in holes that were well drilled out to not risk splitting the gunwale rail).
Using about 5m of a 10mm rope, pass it through the heart of the cleat and tie a stopper knot each side. Then with a bowline on the inboard end, wrap the rope around the ama, tying a small loop on the outboard side before passing through the bowline and then back to the outboard side with a 2nd small loop, before returning to the cleat to tie the end off. These images should help but I am sure there are many ways to achieve the same thing, so this is just one that worked for me. It gives two turns around the ama, which is both gentle and secure.

A large hook or shackle passes through the two loops and the lifting tackle is shackled or snapped to that. These twin loops will always stay on the outside of the ama, regardless of the position of the ama, but the loops must be short and as firm to the ama as practical. as otherwise, when the ama is hauled up high, the tackle may come block-to-block before the full height is reached. It is strongly recommended that prior to lifting, a similar strop is tied both sides and left in place during the time the amas are folded, as tying this on with the ama folded over the boat will certainly be more difficult. Perhaps a simpler strop with strong buckles and a D-ring can be devised to make faster removal possible, but for my derrick test, this rope strop worked fine.
The derrick is now assembled (on the ground) with the beam across the top and the tackle snapped to the beam eye at the hauling line end, and shackled to the two ama loops at the double-block end. I personally start folding-up with the starboard side, which means there should be a prop under the port side with the lower latchbolts still in place to resist inclining as the weight of the starboard ama moves inboard. If you have just lowered the mast, you will want to move the foot of the mast well to port so that the wire diamond and spreader is clear. Rest it on the main beam on a lifejacket, until the starboard ama is folded.
Now position the derrick against the lower chine of the ama, with the foot ‘at some distance’ under it. If it is too far under, the derrick will be hard to hold and support with one arm, but if it is not far enough under, the load on the derrick when the ama up high, will be trying to pull the derrick too strongly towards the boat.
It's very important that the tackle be shacked or snap-hooked to the ama lifting loops. NEVER use an open hook, as when the ama is at the top of its travel and supported by the temporary strut, there is NO weight on the tacke and an open hook would disengage without knowing, as its now on the non-visible inner side of the ama. So ALWAYS use a shackle or a large snap hook that ALWAYS remains closed, even when the tackle is slack.
Personally, I start to lift with the derrick foot roughly in line with the inboard gunwale of the ama, adding tension to the hoist while I start to lift the ama with the free arm. It’s initially ‘an armful’ but at this part of the lift, nothing can fall far and the derrick soon gains stability as it starts to take load and the ama starts to move upwards and inboard. Throughout the whole operation, maintaining TENSION on the HOIST is key to derrick stability, as when hooked to the AMA, they each hold each other up. I suspect that the use of a rope fairlead and a Camcleat fairly high on the derrick, may add to the ease of achieving this. I presently use a conventional horn cleat and while very secure, it does require time and dexterity to ‘undo and redo’, something that could be simplified. But any camcleat WILL need a good fairlead above it, to guarantee the rope is both well led and stays securely engaged.
One can safely and fairly quickly raise the ama until the straight part of the AKA’s are near vertical, as the weight will still be safely outboard of the hinges. But then it's time to stop and cleat the hoist while you throw the attachment line for the Strut (prop) over the ama and cleat it to itself, pulling it firmly to put some tension on the line … tension coming from the 300mm length of shockcord that is part of the line. See sketch at left.
 At this point, the upper end of the strut will have its ‘beak’ firmly engaged with the ama deck corner while the lower end of the strut will rest close to the cockpit floor and square to the cockpit side.
 Throughout the operation with the strut, its important that it stays very close to perpendicular to the boats centerline and also that ‘the beak’ is engaged with the inner corner of the ama side and deck.
One can now get ready to ease the hoist as one slowly and gently ‘nudges’ the ama inboard. It will roll (drop)-over-center barely a couple of inches (50). when the lower end of strut will come to rest against the cockpit side. (You will hear a light 'clunk' when this happens in the video).
In this position, all is quite stable and there will no longer be any tension on the hoist. See photo at right.
One can now re-position the lower end of the derrick farther inboard, so that its base is now vertically under the hinge with the derrick laying close to the outer cockpit-side. At this point, the elastic retaining line for the strut can be released, but do not yet disturb the strut.
Then the hoist is again tensioned and weight ‘just’ taken off the strut … just enough for it to drop or be lowered out of the way but a warning here …. Do NOT pull the derrick towards you more than needed to release the strut, or the ama will swing towards you also, trying to come back down to the starting position! If you sense that, just keep tension on the hoist and nudge it (and the derrick post) back up until you are ready. With tension on the hoist, (or the strut firmly in place), the ama cannot fall.
 Once the strut is out of the way, the ama can be easily lowered on to the beam supports and the folding operation of that side is completed. See photo at left.
 In my case, that first ama will be the starboard one, so I can now put my portable mast support over the bow of that ama and lift the mast foot up on to the highest, most outboard ‘shelf’ of the support, so that the diamond wires and spreader do not interfer with folding the Port ama. See pic at right.
The same process is now repeated for the Port side and once complete, the mast can be moved to the lower and more central shelf and attached there with a shockcord for trailing.
Once a strap has been thrown over the two amas and firmly attached to the trailer sides (to prevent the amas from lifting off their supports on a road bump), we can say the folding is complete.
============================================================================
Now let's turn to OPENING up. If the mast is there, we first place the mast foot up on the highest support shelf to starboard, so that we can start to unfold the PORT side. ie: last side IN is first side OUT.
Again, we nee d to check FOUR very important things … IS the boat LEVEL; IS the boat well supported Port & Starboard; IS the tackle snapped or shackled to the ama lift loops, so that they are impossible to accidentally separate: and lastly; ARE there any lines or obstacles near the hinge, that might prevent the akas from being fully straightened out? Make these checks before continuing.
Working the closing system in reverse, we now place the derrick against the cockpit side with the foot of the derrick vertically below the hinge. The hoist will be lowered into the central space between the two amas and the double blocks shackled or securely snap-hooked to the 2 loops hanging off the side of the port ama. This can typically be reached by standing on the trailer frame just forward of the forward beam. See pic at left.
Now haul on the hoist to raise the ama, but as the aka reaches about 65-70 degrees from the horizontal, hold the beak of the strut close to the ama deck corner until it ‘just engages’ to provide a temporary support for the ama. Do not release tension on the hoist until the AMA is resting in the beak of the strut. When it is, you can slacken the hoist and reposition the foot of the derrick about 650mm farther out, so that there will be space to lower the ama outwards. (As noted above, the exact position of the derrick post will vary, with your particular height and strength being part of the decision). Best to have two small arcs of wood permanently mounted on the derrick post, one each side of the nut holding the threaded bar, in order to prevent the end of the threaded bar from scratching the ama … see first main sketch.
 Now hoist the ama again and stabilize yourself to pull the derrick AND the ama towards you. Once the strut beak falls away from the ama, you cannot allow it to get away from you …. you must continue to slowly pull the ama and derrick outwards. The farther the derrick foot is under the ama, the easier this will be, but if its too far under, the ama cannot be supported by the derrick hoist in the most outer position so will fall more into your arms .. which is no big deal (see video link below). Once the ama is over center, you can start to slacken the hoist to allow the ama to drop to the outer side. See photo at right. As noted above, IF the derrick foot was far under, the ama will then need to be lowered into your arms … not difficult and a totally natural thing to do. But if the foot is farther out, it will be initially much harder to get the ama to fall outwards, though once past a certain point, the derrick can then still take some weight. This will be a little ‘trial and error’ to see what you personally prefer to work with. A taller person can probably work with the derrick foot farther out, but a shorter person will not have the leverage and will be better with the derrick foot farther in …. accepting to physically receive and lower the ama manually for the last few degrees.
Once fully out, slip-in the 2 latch pins under the beams and add a support under the port ama to keep her level, as the center of gravity has now moved out to that side. Now lift the mast foot down from the starb’d support and place is on a lifejacket on the forward port beam so that the spreader is clear of the centerline of the mainhull. There, you can be assured it will not interfere with the opening of the starboard ama.
Now reposition the derrick to the other side and repeat the same steps as above until the starboard ama is also lowered outboard and the latch pins secured in place. The nyloc nuts can now be added by hand to the latch bolts and the trampolines opened out for tensioning … always keeping their forward end up HIGH behind the forebeam, but with the aft end strapped down LOWER than the beam to prevent solid water from hitting it. That’s about it!
Here is a video in which ‘this old guy’ demos the various steps of opening and then closing the ama. Someone taller and stronger could make this look easier, but for me, ‘it is what it is’ ;) Perhaps the only part that looks somewhat clumsy is the initial lifting and then the lowering of the ama outboard at the end.
As I can still handle the ama weight at that height I was quite ok with this, but one could experiment with a small 90 degree bracket mounted on the inboard side of the derrick, with a shelf of about 200mm wide (add foam on top) and fixed at a height to just fit UNDER the cockpit seat so that the derrick can still rest against the cockpit box. This would make a ledge to initially rest the ama on while weight is taken on the tackle, and it would also serve when the derrick is moved out, to receive the ama when it is lowered. Whether it’s any advantage over a derrick without it, remains to be discovered. I might experiment with that addition next summer.
Have fun. This could become your passport for sailing alone ;)
mike
(And thanks to Jon-J in Michigan for motivating me to create this).
================================================================================"See the Copyright Information & Legal Disclaimer page for copyright info and use of any part of this text or article"