

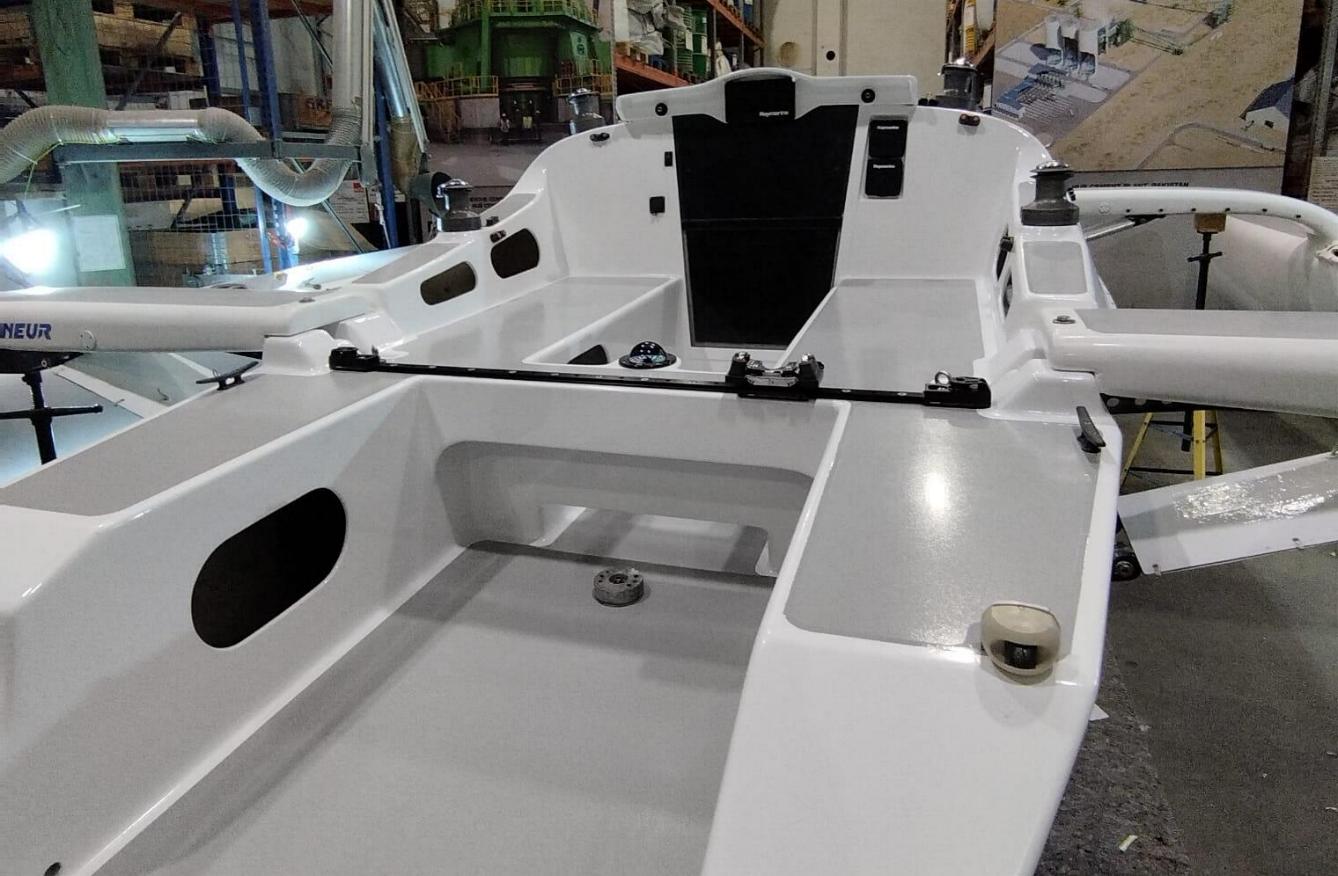
Refinishing a 28ft Trimaran to a high
standard
By
now, most regular readers know that Andre Baetz owns a Farrier F82R. Over the last 10 years, he has tweaked his
boat with something new every year with excellent race results. This is all detailed on this website (see
LINk to YACHT Magazine article) and also here (Link to article on his MidSummerSail
Race attempts).
https://www.smalltridesign.com/pdfs/FLANEUR
ARTICLE Edited English.pdf https://www.smalltridesign.com/masts/TestingMkll.html
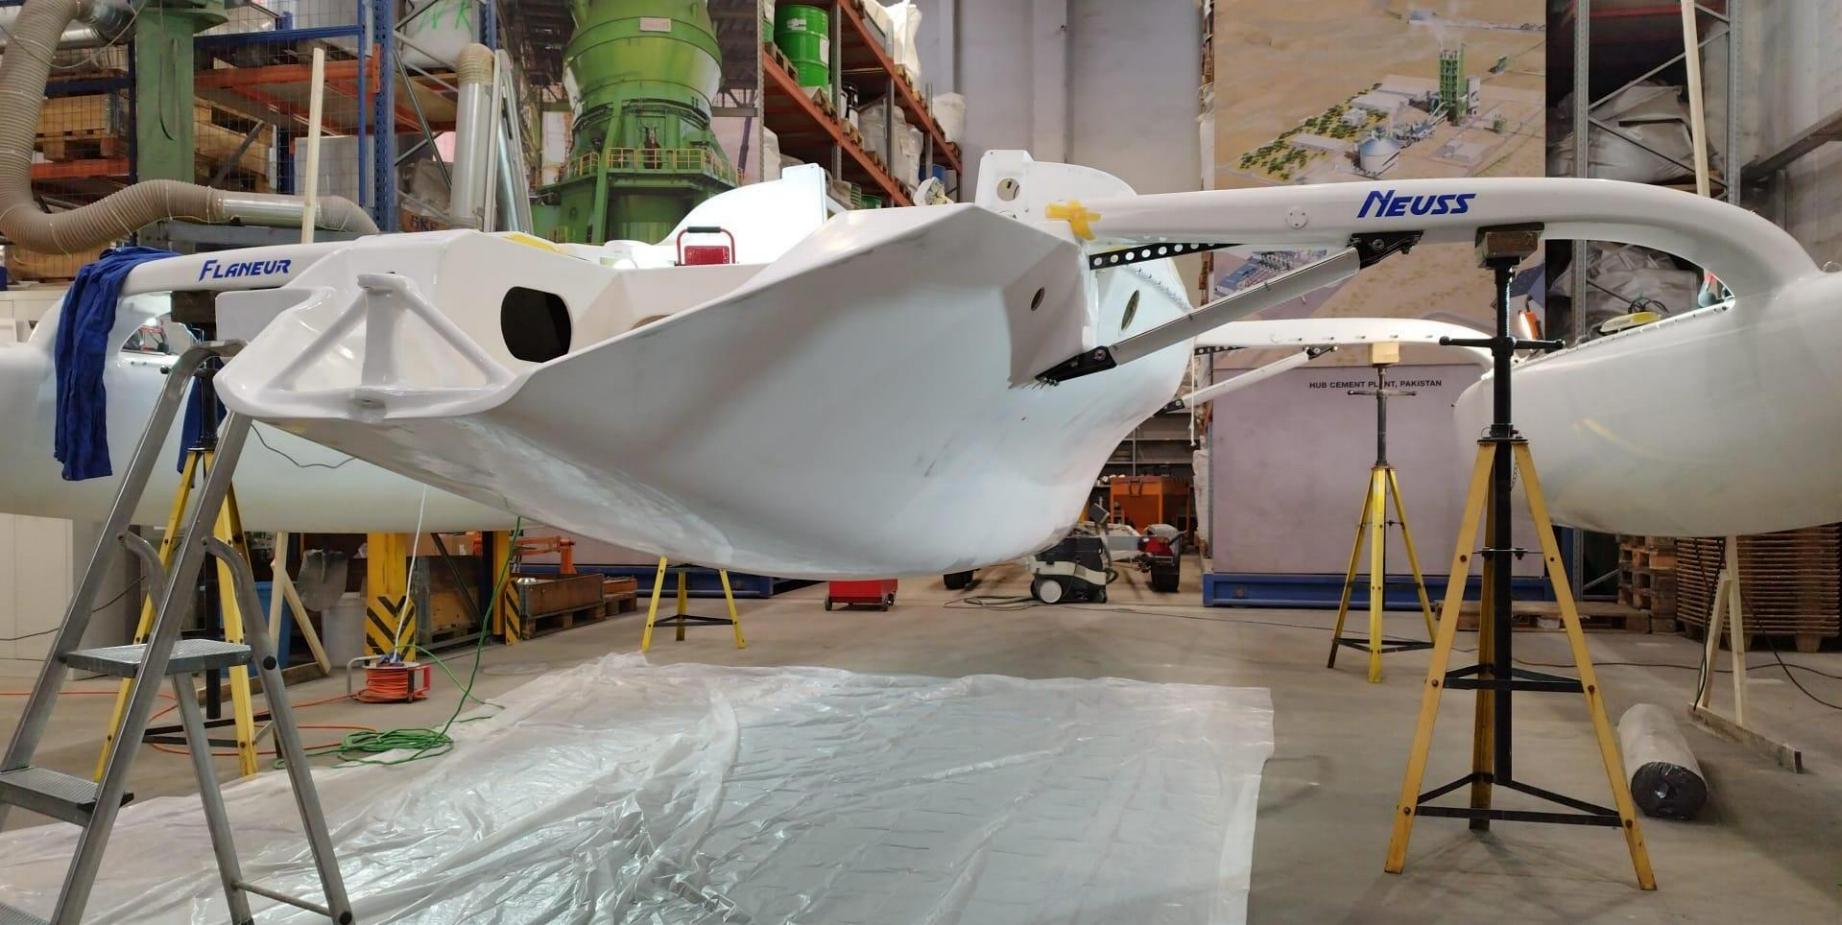
Because
of his development program and successes, the German Multihull Association
invited Andre to exhibit his boat FLANEUR at the January 2026 Dusseldorf Marine
Exhibition. After some 5000 n.mls of
racing, Andre had planned to refinish Flaneur in the Spring of 2026, but with
this Exhibit upcoming, he decided to make a herculean effort to do this in
Dec/Jan to offer a good-looking boat for the Show. But paint needs at least 12C to cure if not
more, so although the sanding could be done at lower temperature, he had to
find a heated place to paint. Fortunately,
he found an accessible heated facility that was closed over the Xmas break,
which proved ideal to get the paint on.
Once
done, I was able to quiz Andre re his methods, so that between us, we can offer
this article:
How
to re-finish a fairly complex 8.2m trimaran to bring her back like new, with a
high quality refresh.
It’s
very clear that Andre has made a stunning job, so here is the detail of how
Andre did it.
First
of all, it’s important to acknowledge that the hulls were already nice and
fair, so although there was still a lot of sanding and pre-surface preparation,
a boat starting with rough, unfair hulls could take at least a 100 m/hrs more.
Steps
for a complete refinish
STEP
ONE is to take off all the spars, sails, ropes, tackles and blocks.
STEP
TWO is to unfold the boat and stabilize her on FOUR very rugged and stable
screw-jack posts … similar to basement pillars but also braced at their base on
4 sides, so there is ZERO chance of them being tipped by aggressive sanding
action, as you will soon need to RAISE these jacking posts enough to pull out
the trailer, so that the bottom of the main hull surfaces will be also be accessible
for refinishing.
1.
First, while you can safely crawl around on the decks, take fotos of all the
deck hardware with any important notes re
positioning etc.
2. Take off all fittings and store each fitting
together with labelled plastic bags now containing the screws used. Check for
damaged screws and in your notebook, make a list of new screws to buy as you
proceed. Sometimes the screws have been cut to fit the thickness of the surface
they are attached to, so it is important to use the same screw length when
refitting the hardware. Replace any screws which are not stainless,
absolutely essential in saltwater and be aware that cheap S/S screws will
likely not be quite as corrosion resistance as genuine Type 316 marine
stainless.
3. After cleaning off the surface where fittings were
mounted (including any silicone or gasket materials), start filling all dents,
holes, scratches with epoxy-based putty. It is a good idea to cover the good
(sound) areas around the mounting area with several layers of masking tape and then
add sanding putty, using the top surface of the masking tape as a height ruler.
This way you compensate for normal shrinking of the putty and you will not need
to resurface several times to get a smooth and fair surface.
As a minimum, do this for a complete ama and/or for at
least one side of the main hull in one shot.
This way, you can take advantage of the fact that you will get better
with practice ;)
4. In way of where fittings go, sand the putty down with rough 40 grit on a hard flat sanding block. Don´t use fingers or soft sanding boards because you will almost certainly create hollows.
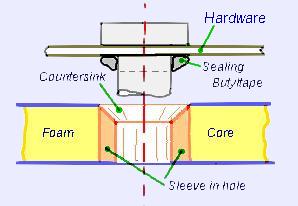
Check all holes for
the fittings. The “ideal” hole is cylindrical with a 2 – 3 mm deep V-countersink
in the deck surface that will permit you to seal it with butyltape. (This tape is a flexible, rubber-based
adhesive tape (available in different dimensions), known for creating durable,
waterproof seals that are long lasting. Available in most hardware stores). You will be painting over that countersunk
hole, so that the butyltape can seal down to painting surface. Note that holes in way of foam core or wood,
should either have a sleeve bonded in, or have a sleeve created with
epoxy-filler. One can create this either
around a temporary waxed bolt of the same diameter (or slightly greater) as the
final bolt size, after drilling a larger access hole in the upper surface, OR,
do this ….
First drill a
hole through the composite shell to match the bolt going through it. Then ‘dig’ or drill** out the foam between
the skins, to make a cavity of 10mm larger dia. **If you check this article, 90% down you
will see a home-modified spade bit that will enable you to do this using a
drill.
https://smalltridesign.com/Trimaran-Articles/Construction-tips/mounting-hardware.html
Holes not yet like this, should be filled, redrilled
and countersunk to be watertight over the longer term.
1. Sanding
an old boat surface will require adjusting to finishes in several different
states, like:
a. Paint
in good condition
b. Paint
with scratches but still solidly in place to the surface.
c. Paint
which has started to fall off in flakes (you can test the bond between paint
and boat surface by putting down some good tape and ripping it off: if the paint
stays on the boat it is OK. If not, it
needs to be scraped off to become like State ‘d’
d. Bare
laminate surface where the paint has disappeared over time
e. A weathered
laminate surface that is now probably lacking resin and therefore low in water
resistance.
Before sanding, check over the surface for any greasy surfaces .. perhaps where winches were installed. Wipe these with a degreaser that is compatible with your paint system ... acetone can often be effective for this but do not use much and allow it to evaporate and dry before starting to sand.
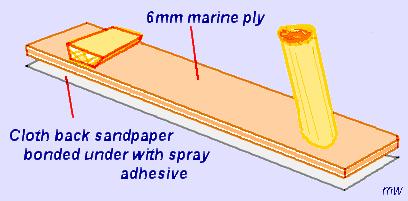
Most time is consumed for corners, edges and recesses. For complicated corners and shapes, form custom sanding blocks out of foam or wood and cover them with sandpaper using double sided adhesive tape or spray-on adhesives. For some areas you can use a 30-40cm length of cardboard tube (or something equal) of suitable diameter, and then hold a sandpaper sheet around it. Bigger areas like underwater surfaces can be sanded with an off-center orbital sanding machine
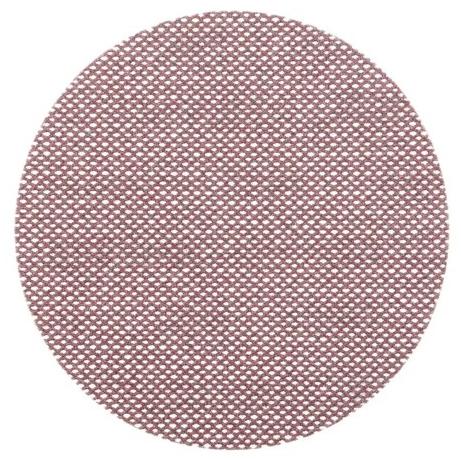
Best (as per Andre) is the Mirka Abranet system. These custom Abranet pads have a fine, micro-diamond openings, that are open to the back. This allows a connected vacuum to suck the dust through the pad, reducing the tendency to clog. If not available, stopping frequently and tapping the pad with a wood stick will help to reduce clogging, but in this case, would best be used on areas that are already fair, but just need a surface to take the paint. Mike makes up sanding pads with a wood handle (somewhat as on a smoothing plane) epoxy-mounted near one end with a large knob at the other. Typically these are 10 cm wide by 40cm long and of 6mm waterproof ply. He has a stiff one with ply grain running down the length and a more flexible one with the grain across the narrow width. He uses spray adhesive to hold on 10cm wide cloth-backed paper (100 grit) that is sold in large rolls which is more economical. For a larger boat, plan the length of these sanding pads at about 1/20th of boat length, as the minimum for a fair hull. If they are too big, they take too much energy to use. (I remember once seeing one over 6ft long with 3 handles and 3 guys pushing it !)
4. Sand until you are really satisfied with the complete surface. This can
take 4-6 weeks of part time work and for my 8.2m boat it was well over 150 hours.
(So never ask a good friend to help you
sand, as this can kill friendships ;) Much of the boat can be worked on while the boat is still on the
trailer, even though the 4
adjustable posts will still be needed under the beams. To sand and paint the underside, these posts
will be raised to allow the trailer to be pulled out, but for best safety, we
recommend to put it back before climbing up into the boat or on the deck.
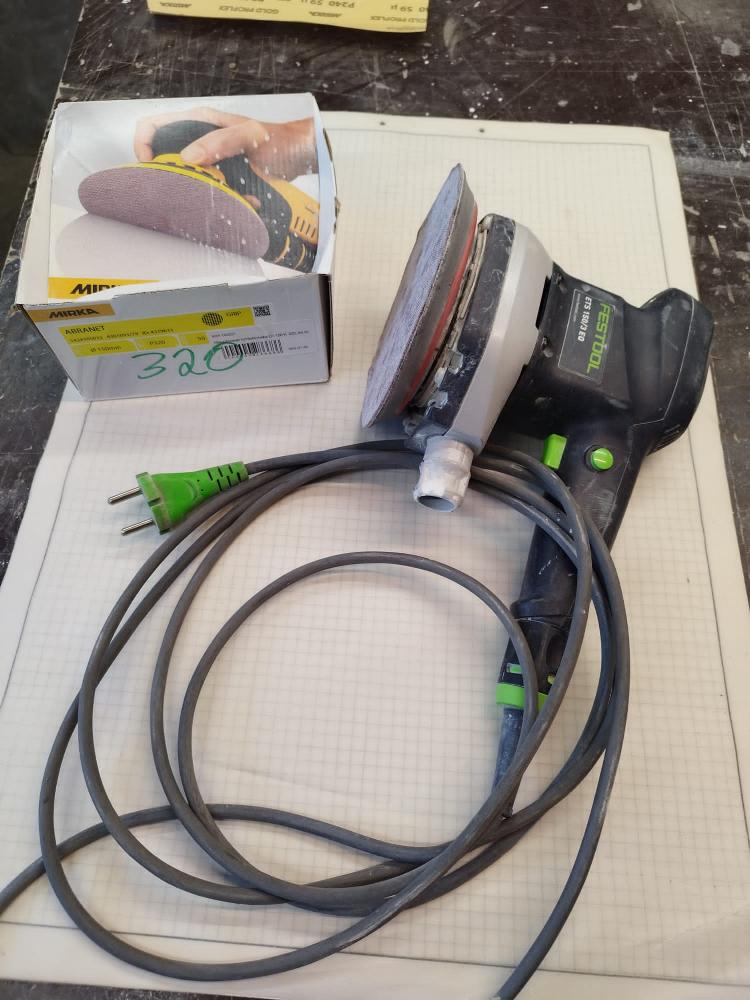
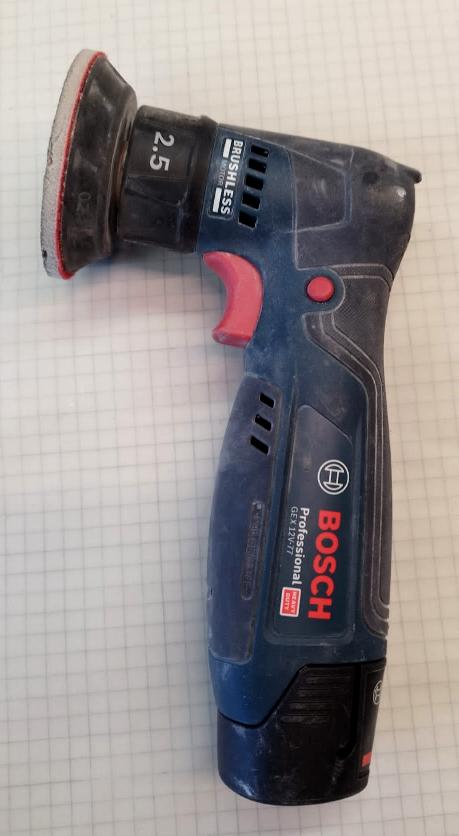
You will also find a small battery sander can be very handy for small areas. (see photo)
5. Once finished, fair and smooth, the boat now needs to be aggressively and thoroughly de-dusted. First start mechanically with a brush, then with a vacuum cleaner. Finally, what is called ‘a tack rag’ is used. This is a rag slightly moistened by something compatible with your paint .,.., like a thinner etc (Classic ones for varnishes used linseed oil). Pass this rag over all the surface and particularly check in any corners or holes where clogged dust can collect …. only to be annoyingly picked out by your paint. Try and keep it as clean as possible with occasional rinses and fresh moistening. Preparation before painting is a HUGE part of the final result, so do NOT brush over this lightly.
6. Now cover all parts and fittings NOT to be painted, which have stayed on the boat. For small parts, use masking tape to cover the parts completely, otherwise you will regret it (as we both have done). For larger areas like windows, cut out paper covers, about 15-20mm smaller all around than the window and then seal down the exterior edge with masking tape. Take your time to EXACTLY place the tape to the edge of any part you do not want painted and I prefer to use just ¾” wide tape for this as it’s easier to place accurately. Then use a wider tape to cover the inner edge of that one. A good clean and accurate masking tape job is perhaps even more important than a good paint job … a sloppy job here will immediately show up when you remove the tape. To not risk to pull paint ‘up and off the surface’, peel the masking tape right back (180 deg) when removing it.
7. Close all through-holes with masking tape from the inside of the boat. This prevents paint dripping through.
The next steps are closely related to the paint system you use. Andre used: https://www.nauticare.de/lacke-beschichtungen/2k-lack-farben/https://www.de-ijssel-coatings.nl/en/aquatics/products/categorie/double-coat This is a 2 component polyester DD paint from Holland, which has a very good capability of self-levelling. It can be applied well with a high density fine pore foam roller, which is also available from the same company. It’s almost always better to stay with ONE system supplier, as of course they sell what helps their paint achieve the best result. For those in the USA where the Dutch system may not be available, it’s possible to get a similar result by adding ‘a little something’ to slightly thin the paint. 2-part paints are typically more self-levelling as they cure. The 1-part can benefit from the 10% Penetrol, which is available from most hardware stores. Penetrol works with paints of an oil-base, but is not suitable for 2 part paints that cure chemically. For water/latex-based paints, one can use Floetrol as an optional thinner to aid levelling.
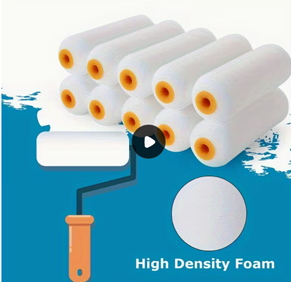
Andre recommends using these rollers (see above). Most of the boats surface area on his F82R was going to be white with just the non-skid areas painted in a light grey which needs less paint layers. White needs 3 – 4 separate layers to prevent any dark carbon fibre areas shining through.
The painting sequence is as follows and Andre describes
the ideal conditions to aim for :
a. Room,
paint and surface temperature 15 – 16 °C
b. No
open doors or air movement
c. The
room should not have been used for 24 hours, so that any remaining dust in the
air has a chance to settle down
d. Cover
the floor with painter´s sheets, and ideally spray out a little water on them the
day before to hold any dust down.
e. Thoroughly
read the technical information about the paint before starting to paint
f. Make
a final ‘de-dust’ of the surface with ‘a tack cloth’ shortly before painting
g. Mix a 2-part
paint with the hardener and wait 30 to 45 minutes for the paint to start
activating. (Don´t start painting too soon, as it will not behave well.
h. Use a
face respirator mask with active carbon filter to protect against solvent
vapors, and also plastic gloves.
i. Clear
of your work, de-dust each new foam roller before use by spinning it by hand
several times, and also squeezing it to get rid of any static charge
j. Wet
out the foam roller and while in the tray, let it suck up some paint for a
minute before starting to roll. Equalize
the paint around the surface of the roller in the paint tray. (Andre uses a
paint tray with exchangeable plastic inserts)
k. The
paint must be applied “wet on wet”. At first roll 3 – 4 vertical strips, each
strip with new paint. The first strip starts at the top, the second at the
bottom and so on alternating the start position. This will assure a good and even paint
distribution over a rectangular area of about 40 to 50 cm width. Each strip
should have a distance of about 2 cm without paint between each other. Then roll over horizontally, repeating the
above spacing, directions and layout, but at 90 degrees to the first one. Then repeat the same rolling again … both
vertically and horizontally again. So to sum up, 2 horizontal and 2 vertical to
fully equalize the paint, but all done quite quickly with minimum delay. Finally roll horizontally over the whole
rectangular area one more time slowly and with only a very light pressure. This gives the paint the final profile to
start its self-levelling. Always carry a strong LED lamp in your other hand to
check that there is a continuous paint surface of similar texture and colour. Hold
it low and tangentially to the surface and you will see every abnormality. ‘Self-levelling’ only works when the liquid´s
surface is continuous like an ocean! If
there is a break in the surface, it cannot self level as this is achieved
through surface tension. After this
start, apply paint for the next area in the same manner. At the last light pressure step, pass over
the edge (rim) of the previous rectangle to “connect” the areas to assure the self-levelling
tension . This is what it means to work
“wet on wet”: the separate rectangles
will still connect for self-levelling as long as it’s done without much delay. Don´t
make any breaks longer than a few minutes. The allowable “open time” is related to the
temperature, when the lower the temperature, the longer time you have. (But 15
°C is the minimum for this kind of paint).
As soon as the foam rollers start
feeling heavy, swollen up and “oversoaked” take a new foam roller! Andre does not fool around with challenging
oversoaked rollers. For the whole boat
he used 40 foam rollers! (Roughly 3
coats of 3m2 per roller)
l. The
next layer of paint can be applied without sanding if applied within a time
window – ’X’ hours depending on the temperature but typically close to 24
hours. The new paint layer then connects
chemically with the one before if you stay in that time window. After 2 or 3
layers (white) the necessary paint thickness is nearly reached. Now it is time to
apply the final finish layer which must be treated differently.
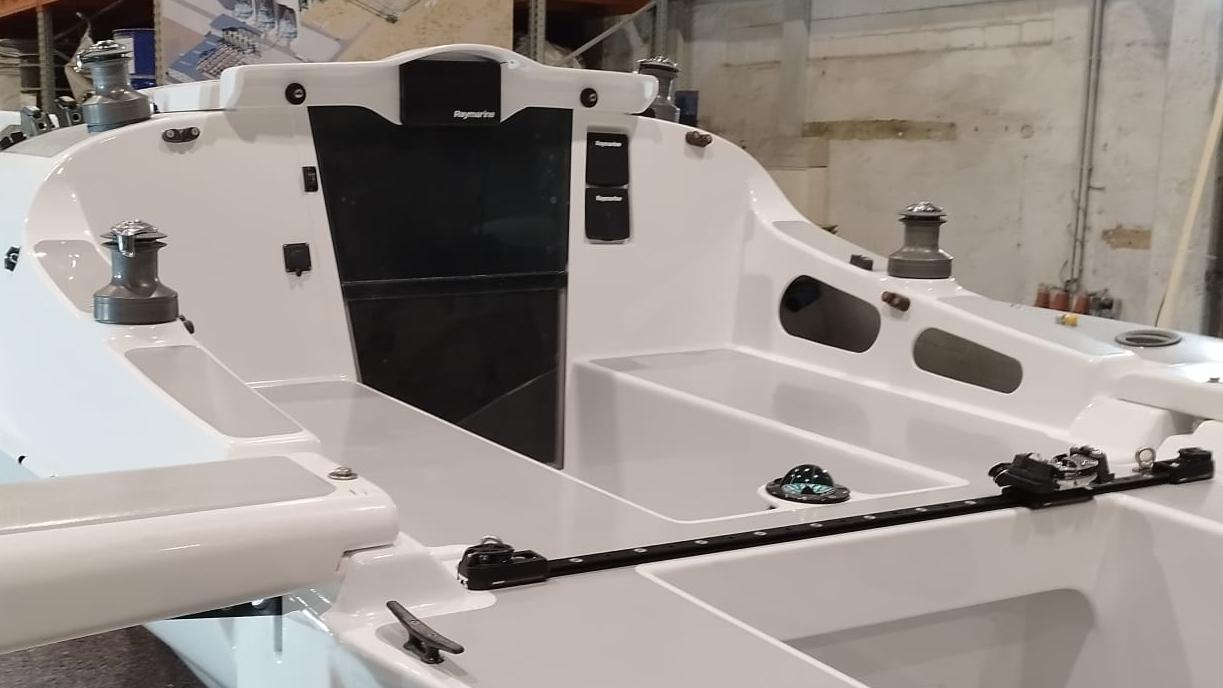
m. Sand away undesired paint tears (smooth surface bumps from excess paint running). Suggest to use a Mirka paint sander. Eventual pinholes can be filled carefully with a fast-curing epoxy filler like this one:
a. Sand
over the whole surface by hand with 320-400 grit, to only take off the ”hills”
of any slight orange peel and dust particles.
b. Dedust
with your tack cloth**
c. Dilute this final paint layer
after the two components are thoroughly homogenized with 3 – 5% of
weight (Only use the recommended thinner for this paint!)
d. Wait
for the activation time and after stirring up again, check the viscosity by
test roll painting on a dust free surface: the painting should feel “silky”
with easy self-levelling.
e. Now
roller paint again as described. After painting the first 3 layers you should
now have enough practice to reach a near perfect surface. But this time you can
proceed a little slower. Because of the thinner, the open time is longer and
gives you the opportunity to check the continuous paint surface for perfect
self-levelling with the always present LED lamp.
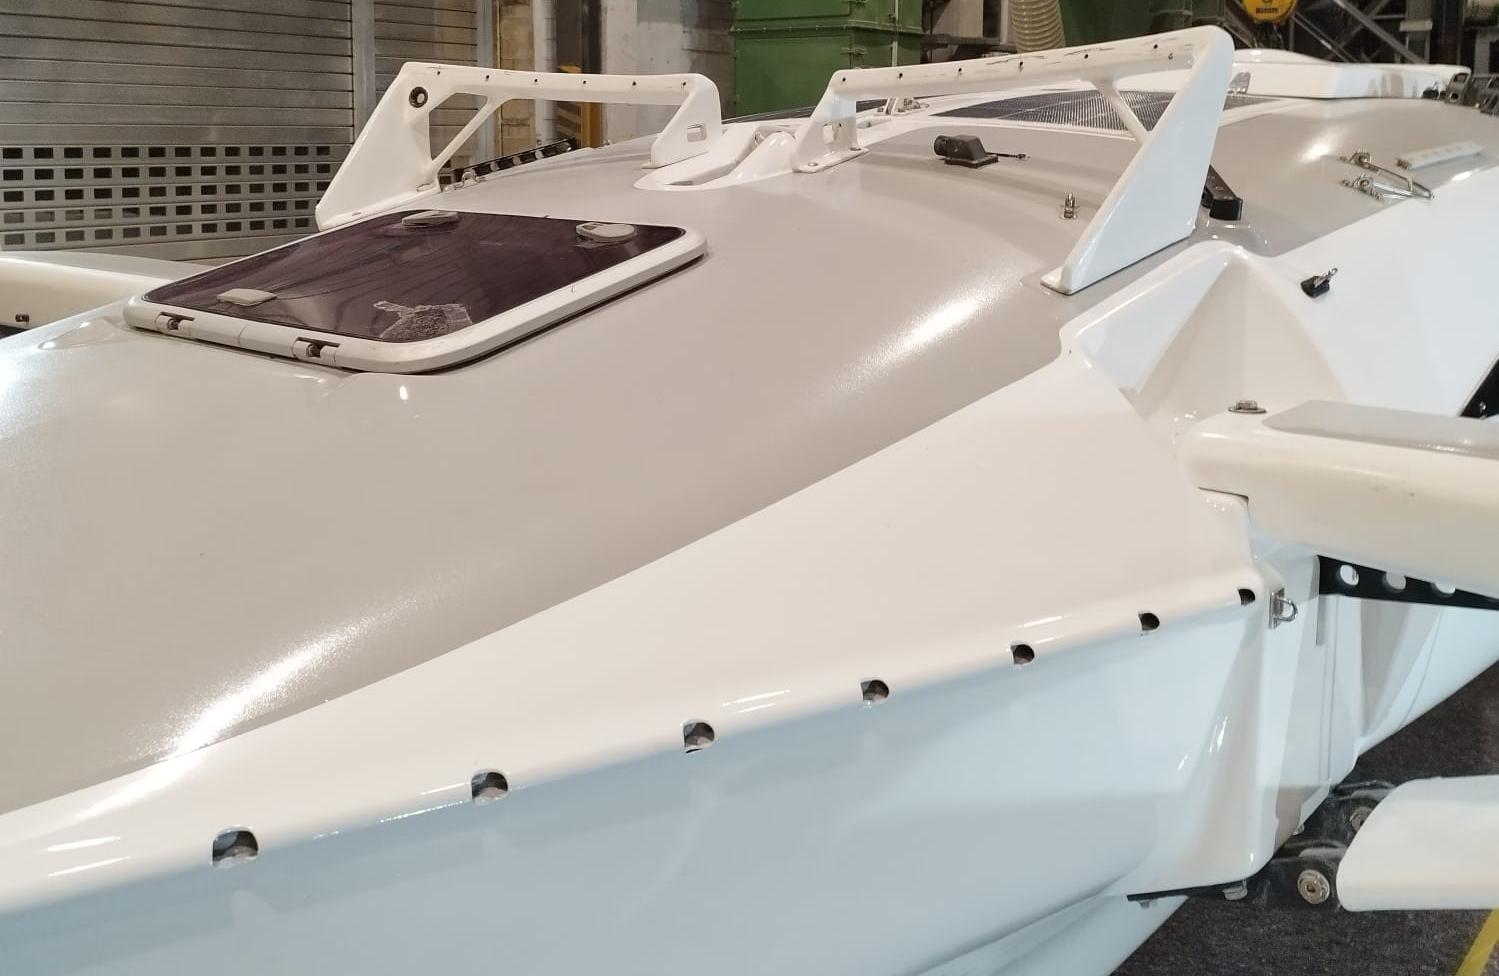
8. Andre
started with the white areas above the gunwale. He marked all the separating lines between white
and grey in advance, and then protected the future grey non-skid areas with
masking tape. For curves he used PVC contour tape of 6 – 10 mm width. But this
tape needs to be fixed by additional tape (Washi tape gold is one option and is available in
different widths). Take care to press the masking tape down well, especially
where one tape covers a previous one. Otherwise, the paint risks to flow under the
tape by capillary action !
Here is how
Andre describes the job from here: ……
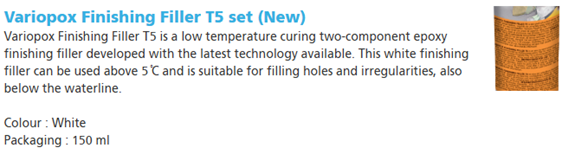
9. “After
painting the deck white, I also painted the complete boat below the gunwale in
white. Painting the complete boat alone, “wet in wet” in one go is impossible.
Therefore, you must plan the visible future “mating edges” strategically, into
places where you cannot see them later, like below the wingnet attachment
tube. Any mating edges unavoidable
visible, can also be worked over mechanically by fine sanding and machine polishing
later.
10. Next
step is protecting the white areas from the grey paint when roller painting the
“deck grey.” First make certain that the
paint has cured well before covering it with masking tape. Otherwise, the surface will likely turn dull
due to a chemical reaction between the uncured paint and the tape. All the
previous masking tape needs to be peeled off and then you can cover the white
side leaving just 1 mm of fresh white visible. Go over the edge of the white
paint with 320 grit and sand it down flat. (The masking tape can leave a
visible edge otherwise). As you are now
going to paint a colored deck over the white, make sure the masking tape sticks
perfectly to the underground white without pockets for the paint to seep in
under the tape (then, over the white !)
11. Once
again before painting, dedust the surface with your tack rag.
12. Roll paint the area in grey. But now rotate the roller slower. If you don´t, you can throw out colored sprinkles by centrifugal force! So do the deck more slowly and controlled. My Grey color did not need more than 2 layers to cover well. Therefore, you can apply the diluted finish layer as soon the surface is a consistent grey. Non-skid areas also don´t need to be as perfectlyl smooth as the white areas, because any unevenness will be covered by a non-skid granulate later
13. There
are 2 possible solutions for the non-skid cover:
a. Use
the masking tape which is already in place for the non-skid layer
b. I however,
prefer to tear off the masking tape and apply new tape, now taping around
hatches and deck hardware as there is no need to have non-skid paint under a
winch or say, a clutch.
14. So, I
covered all areas of the grey deck where I didn´t want to have non-skid
paint. All extra work but for me it´s
worth it.
15. The
non-skid paint is a mixture of clear paint and a special granulate. The granulate
has a similar density to that of the paint itself. This makes sure that the particles don´t sink
down in the pot after stirring it up: they just stay in suspension, so the mixture
can be applied with a foam roller in the same way as the plain paint was before.
The granulate I
used was available from the Paint Supplier, a “Double Coat Antislip Powder”
16. The mixture is 5% by weight. While some antislip products (like sand)
need to be over painted, this one does not.
So now the paint work is complete!
17. Final step is remounting and sealing the deck hardware: Use
butyltape in the same colour as the deck you are seating things into, if
available. Just cut or tear off what
you need and with fingers, form a small kind of O-ring around the screw and
stick it into the countersunk hole, or around the screw below the hardware. Hold the head of the screw firmly and screw on
the nut from the inside. (For fittings where you can´t reach from both sides at
the same time, you need two persons). Don´t turn the screw from the outside or you
risk to wind up the butyltape and destroy the seal. Your butyl O-ring should be firmly pressed
into the countersink and seal between the hardware and the deck surface.
Butyltape is resistant to UV-rays and will stay soft and flexible. It provides
a very good seal, much better in my experience than SIKA or other sealants
like silicone. The amount of butyltape should be just a little more than needed
for filling the countersink. Do not overtighten the screws or you risk to
damage the foam core by compression”.
Article put together by Mike & Andre, Jan 2026
OK, that about completes the job unless you plan to
add names, decals, stripes etc. While
these are tempting, remember that they complicate any future repainting or
touch-ups and their edges add drag if they extend below the water surface. A simple stripe just 5-8 cm below the deck adds
a slimming look and one of speed. Such
a vinyl tape is easy to remove if needed with a hair dryer.
In
closing, just a couple of thoughts while on the subject
First,
getting organized to use sandpaper with water is very worthwhile when you have
large areas to sand. The ‘paper’ must
be cloth backed and sold to resist water.
Forget the cheap stuff as it will fall apart on you – best to shop for
this at a supplier for professional painters and I suggest to buy a long roll
of 10cm wide of say 80-100 grit to do much of the work. When working with water, you can figure on an
effective Grit value of about 50% more, so 80 with water will produce the
smoothness of a 120 dry paper in my experience.
You will find that there is a ‘sweet spot’ when sanding wet. The grit will finely cut the paint surface
and then form a paste with the water. IF
it’s neither too wet nor too dry (the sweet spot), it will act as a lubricant
and not only cut better but also be easier on the physical effort. If it starts to clog even a little, wash
off the pad and start with a fresh water dip.
If water is running off the surface, you probably have too much of
it.
Finally,
Why not spray finish ? Even before Andre & I ever met, we had
both tried this and interestingly, had come
to the same conclusions.
This
is really quite an art in itself and takes many hours to do a professional job
and few have that time available.
Thomas, building in Germany, really wanted to try this but in his report
to me here https://www.smalltridesign.com/W17/BuildersStories/C154Thomas.html
)
states
that it took him MONTHS of practice before he was happy with the results.
But
this is only the beginning. Spraying is
a terrible air polluter. First the paint
has to be thinned by added (unhealthy) solvents so that it can be sprayed as a
mist. But some of this then fills the space you are
working in. so a dedicated ‘paint booth’ is needed. Within that space, EVERYTHING will be touched
by this fine spray so masking must be 100% and that includes walls, floors …
and yourself (!). You really need a full
Hazmat suit and a high quality mask and even goggles, that make for a most
uncomfortable working environment. And
if that is not enough, it’s hard to control film thickness and with so much
solvent now in the paint, we do not feel the final paint surface is quite as
hard as when rolled on, as some solvent will inevitably be trapped in the first
coats. With practice, rolling is JUST
as quick and takes less time overall if you had to build and then dismantle
your own paint booth. Rolling is more
controllable and really very satisfying to do, and anyway, putting the paint on
is only a small fraction of the overall time of refinishing a boat.
That’s
our opinion anyway .. and we still get fellow sailors asking “Wow, is that
sprayed on ?” So we are happy with the
low pollution of rolling.
Mike
.. Jan 2026
An estimate of the time and
cost to do the above work (based on the high quality of
this example), might
be assessed from these simple formula …..
A rough
estimate for the time can be estimated by:
Hours = 4.5 (L x L )
(MainHull length in Metres)
Material
Cost (Euros 2026) = (Above hours) x 4.5
(for: Paint, thinner, sandpaper,
masking tape, rollers etc)
Professional
Cost (Euros 2026) could be ~ 40 (L x L x B)
"See the Copyright Information & Legal Disclaimer page for copyright info and use of ANY part of this text or article"