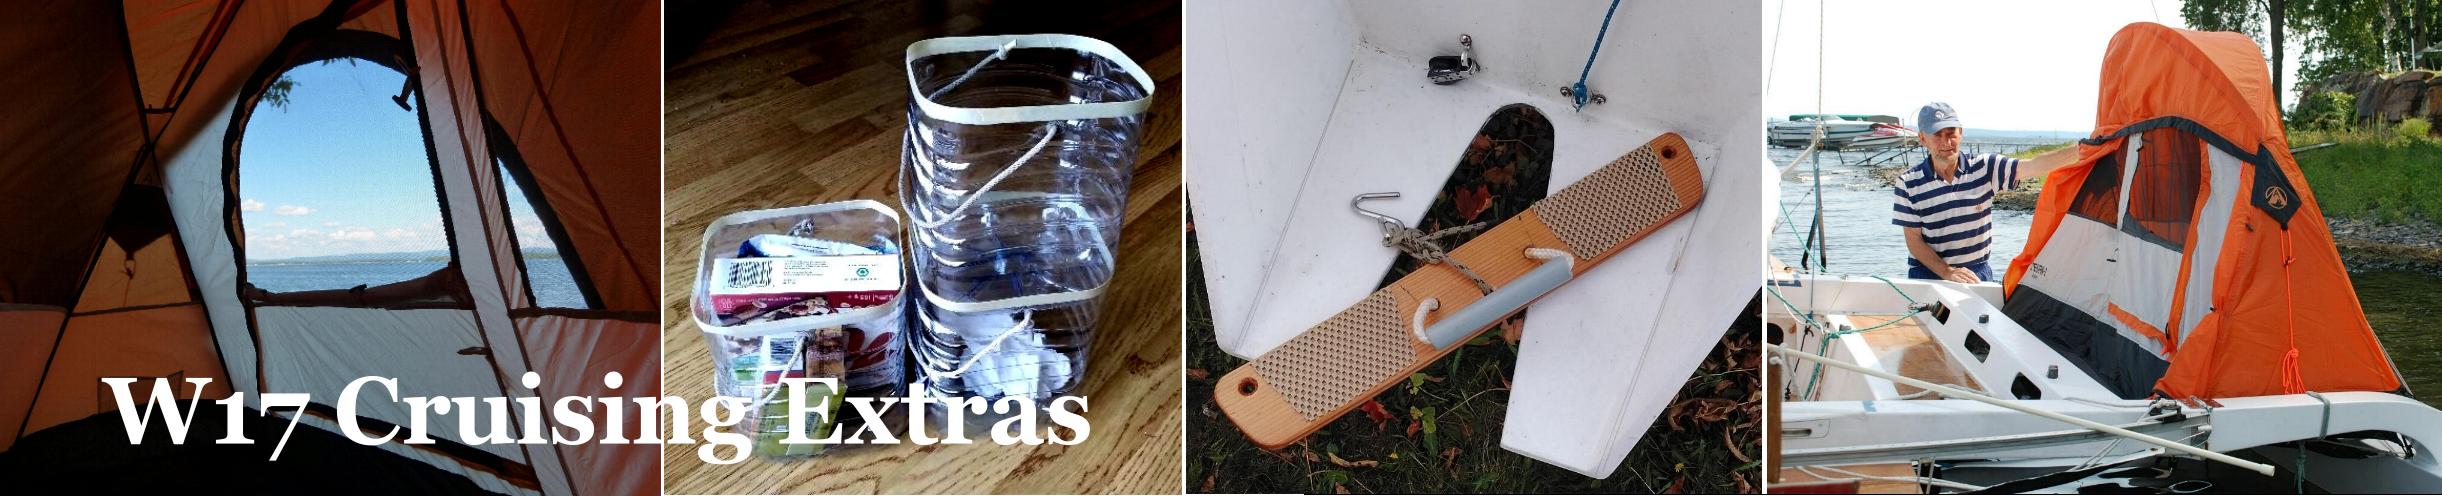


Tips for BEACHING your W17 when Cruising
Since the W17 was born back in 2010, this efficient, strong & capable platform has attracted many sailors with plans to use the boat for their personal adventures. This has sprouted some interesting accessories that I think are worth sharing. This first CRUISING article will discuss BEACHING.
First, any cruising will occasionally require that the boat be hauled up a beach and as a loaded boat will be in the order of 500lbs, this will call for some non-human ‘helpers’. Here are a few I've find helpful.
To move such a weight we first need to reduce its dry land drag, so getting a roller or two under the boat will help greatly. Rollers can be either pipes or inflatable tubes. Both have issues to think about.
First, the pipe. A 2” diam heavy duty PVC pipe is about the smallest that will roll, but PVC slips around rather annoyingly. Bonding on a layer of 3mm dense foam with contact cement will help tame this and at about 27” long, such rollers will still be wider than the hull bottom yet not too long to stow down through the round forward deck hatch in the ama … so carrying two of these is easy.
Here is how I made mine. The foam I used is quite tough .. and similar to that used over the ground under a tent floor, but thinner. Foam used for neoprene suits would also work. I carefully measured the width required to roll around the tube without stretching it. (If you DO stretch it, I've noticed that it creeps back to its relaxed state and then leaves a gap at the joint). Contact cement is convenient for the bonding. Once bonded on, I duct tape around in a slight spiral with minimal overlap, just to add to the surface toughness. An extra layer may be required after some use. (Pegasus, the first boat to cruise extensively in the China Sea, used 75cm lengths of 1/2 tubes (3"-4" dia) with the rounded side up to place on the sand, but this does scratch the bottom more).

For the inflatable, they are mostly bigger than is needed so take space even when deflated. They also are quite expensive and take time to inflate so need an air pump too. But are certainly kind to the boat. Their cons are better balanced with their pros for boats of round bilge, as their deformation helps to stabilize such boats. But if you can find smaller, shorter ones, (say 90cm x 15cm dia) then a good choice.
But getting either roller under a boat that’s heavy enough to need it, is not easy. We humans can lift very well from the ground up 50cm, but far less from 50cm on up so we need to exploit that fact by preparing grips as low as practical.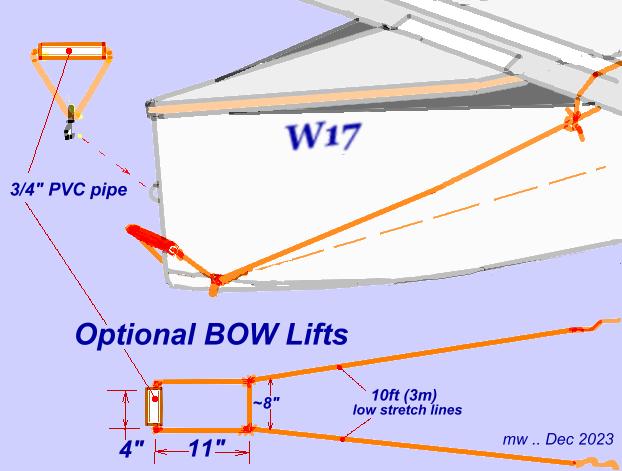
At the bow, there are really just two choices if alone. One effective option is to have a strop under the bottom at the bow, with low side lines knotted in to prevent it from sliding forwards (see sketch). Finding somewhere to attach these retaining lines is a challenge but passing each up under the main beam and tying them off can work. Clearly, going to the rear beam would be more geometrically effective, but now requires retaining lines that are at least 17ft long .. and using your nylon anchor line is a poor option as it stretches far too much. A dedicated lifting strop can be well worth preparing. This system can also work for a Mono, but then best used with inflatable rollers, as noted above..
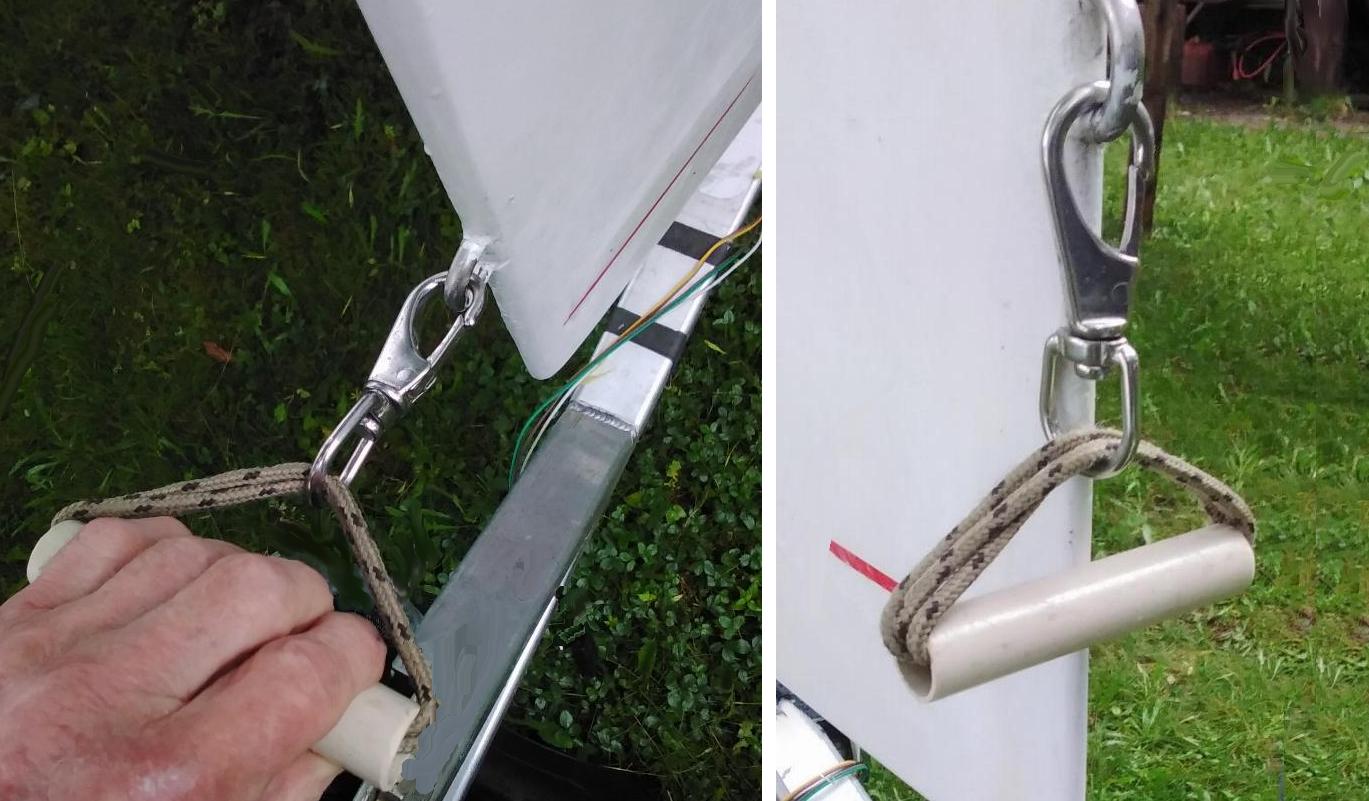
A simpler solution that works best for taller people (as it attaches a little higher), is a small, compact handle with a snap hook that clips in the stem eye, normally used for the bobstay and trailer … an argument for placing it a little lower than the plans show if you know you will be often lifting the boats’ bow alone. A useful gadget easy to stow in the mainbeam locker by the foredeck.
Sometimes it’s advantageous to beach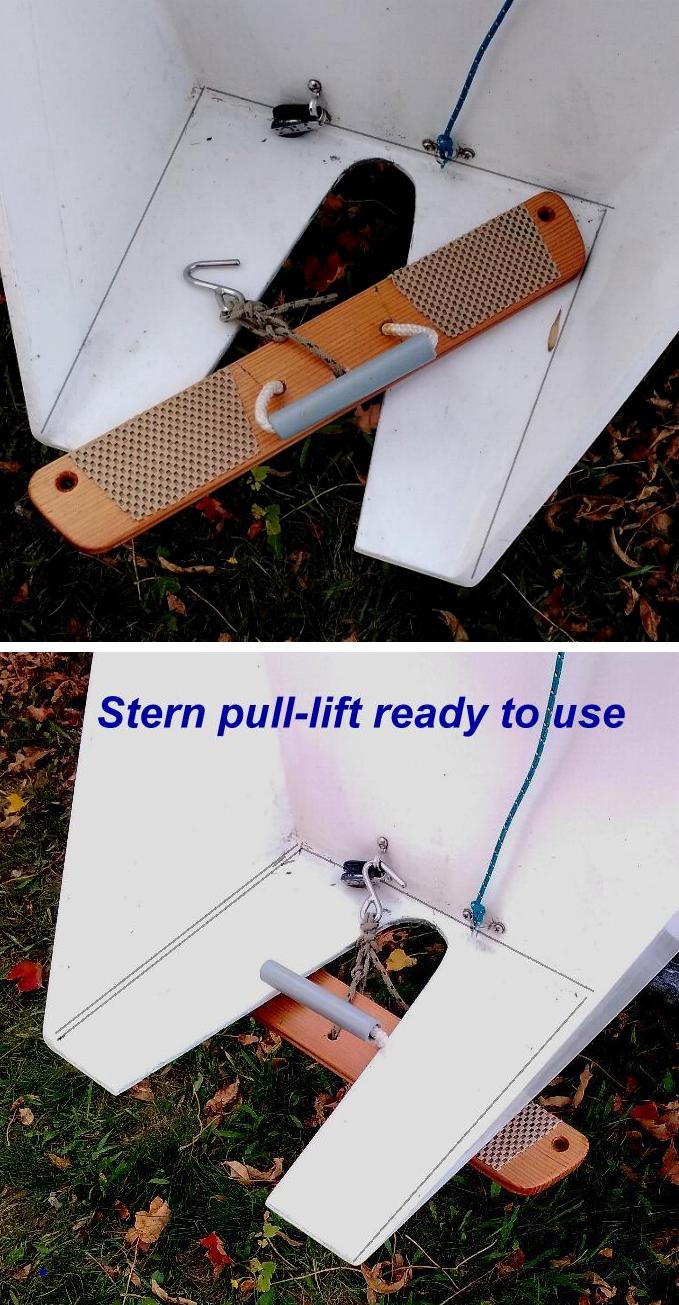 a boat by the stern. In this case, there’s a way to directly lift a W17 from the underside of the flat bottom …. and that is with what I call a “board lift”.
By raising the rudder, there is access to the bottom Vee. I then use a good quality wood board of about 100x20 section and about 500mm long with a rope handle at the centre that is accessible through the open Vee. (Always add about 11cm of plastic tube as its comfort will improve your pull at least 30% ... even more for oldies with 'tired' or arthritic hands),
Although the board has non-slip rubber glued to the top at the sides which mildly grips the bottom when you lift, this will still slip if you pull back hard on the board. So I have a short line with a strong reefing hook that clips to the strap eye of the rudder downhaul. This now anchors it very solidly so you can now lift AND pull at the same time … certainly enough to kick a roller under.
Of course, do not get carried away and haul your boat up too far, or you will then have to pull yourself back to get afloat. Being in a tidal area will factor into your decision whether to beach or stay afloat, as will predicted wave conditions for say, the next 12 hours.
.
MOORING OUT
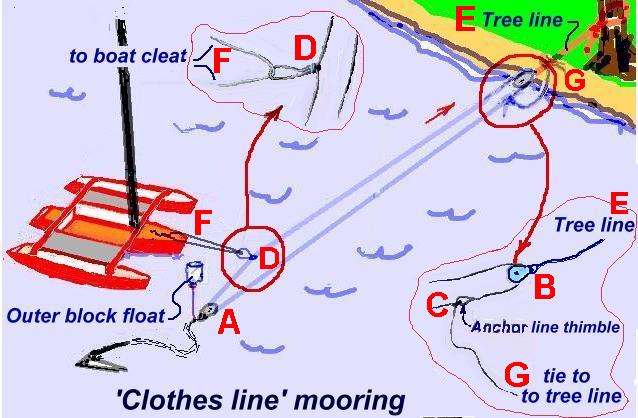
Another possibility is to not drag the boat up the beach at all, but if the area is suitable, just anchor the boat off-shore. Here are details of the 'clothes-line' method of doing this, so that you don't have to wade in. Could be useful in cold water ;)
For this, your nylon anchor line (100ft?) can double as a 'clothes line tackle' running between a block shackled to your anchor chain and another on shore. If your boat is tied to this line, your can come ashore and then haul your boat back out into deeper water, yet still easily retrieve it after a night in a tent ashore. See rough sketch for general concept. Tying a sealed but small, partly-empty water-bottle to the block on the anchor chain, to keep it just off the bottom.
 Having a strong 50ft of non stretch polyester rope of say 3/8” dia with you will now be useful, as you can tie one end to either a tree or boulder and then attach and tension your shore-end pulley. For clarity, I will use the expression 'clothes line' for 'the doubled line and pulleys' so described, as that is what it resembles.
While this looks simple enough in a sketch, one needs to plan the order of rigging things to set it up while still on the boat, unless the water is shallow and warm enough to rig things on the beach and then carry the anchor out about 60% the length of your available anchor line.
(I admit I had to write and re-write this description a couple of times, as it's ~45 years since I last personally used it for a cruising dinghy. This reminded me that the method & order of doing things is rather important ;)
Unless you have two anchors, you need to rig the anchor end of your clothes line first, so that you can get the anchor down to keep you in place … which will be about 50-60ft offshore and abreast of some suitable anchor point on the beach, like a tree or large boulder that you already located when choosing a good landing spot.
First unshackle your nylon anchor line from your short (typically 4ft) anchor chain and replace it with a pulley-block A, (which will ideally have a small [bottle] float attached to keep it just off the bottom). Thread the free end of the nylon anchor line through this pulley and pull it totally through until the thimble at the end stops it. Now feed the other (free) end of the nylon line through the other pulley B, (till it's about 1/2 way along) and then tie the rope end to the thimble C to complete the clothes line, but leave about 40cm (16") of rope tail free G for use later. (see below**)
At this point you can lower the anchor in and temporarily cleat the now-doubled anchor lines holding the pulley, float and chain, to the boats' deck cleat.
Stretch out the doubled clothes line and pull the free block to the end of the 'clothes-line loop' and then tie a loose temporary knot with the pulley to prevent it prematurely sliding along the anchor line. Then attach your polyester shore line E to the becket of this 'shore end' pulley B. When ready to go ashore, release the anchor line(s) from the cleat but now temporarily attach that shore line E to the boat cleat while you paddle the boat ashore .,., stretching out the double lines as you go.
Once ashore, pull the clothes line to make sure the thimble and knot is right out at the anchor chain. Then take a loop of the nylon rope D on the side of the pulley that is free to move out and tie a simple loop knot (as shown at the top of the sketch above). Now take that polyester shore line E that is attached to the shore-end pulley and tie this to your chosen tree, stake or boulder etc. with some tension in it. If you have moored too far out, no big issue. Just accept that 'the shore pulley' B will be out in say a foot of water and then the shore line G will need to be longer.
Finally, run a short (3m) boat mooring line F through the loop D in the clothes line, attaching both ends to the main mooring cleat on the foredeck. You are now moored to the 'clothes line'.
Once the boat is neat with everything 'tied down', you are ready to pull your boat out to the anchor.
Pull on the clothes line. It will only run one way due to the knot & thimble C not being able to pass through the anchor pulley A. With the boat now pulled out, the thimble and knot C that joins the ends of the nylon anchor line should now be close to shore.
You will then tie that loose end G (noted above**) to the tensioned shore-line E that goes around the tree or other shore fixture. This way, the boat cannot be pushed ashore during the night by any onshore breeze or waves.
That's about it. If you use it some time, please send in a photo that I can add. Also please let me know if you have developed any other 'beaching helpers' worth sharing.
.
mike .... February 2024
"New articles, comments and references will be added periodically as new questions are answered and other info comes in relative to this subject, so you're invited to revisit and participate." —webmaster
"See the Copyright Information & Legal Disclaimer page for copyright info and use of any part of this text or article"