

The ABC System …. Align, Bond & Cove.
This system was developed by the author in 2008, to enable a faster & lighter assembly for the new W17 trimaran and avoid most of the negatives of the Stitch & Glue method, ie: the necessity of using ties or wires, together with the making of holes that later require to be filled if the wires or ties are pulled, which is preferred for a neater layup of the corner reinforcing tape.
Before sharing this system, the author chose to let 10 years go by to see how the system stood up over that period and to give
No structural failures and only positive comments have been reported during this time.
The conclusion is that the system works very well for its intended use …. for hard chine designs where the bottom and sides come together somewhere close to a right angle …. say up to +/-25 degrees from 90.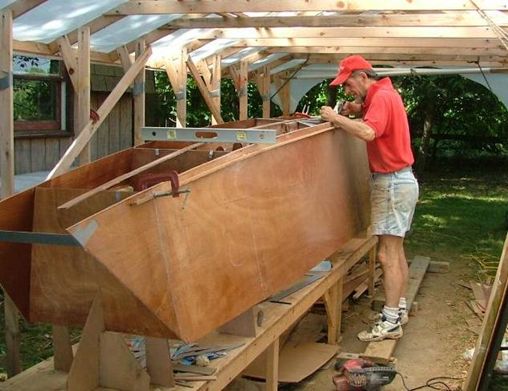
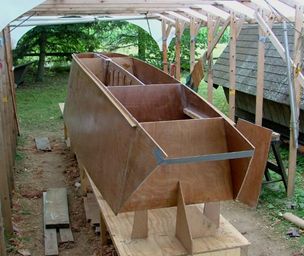
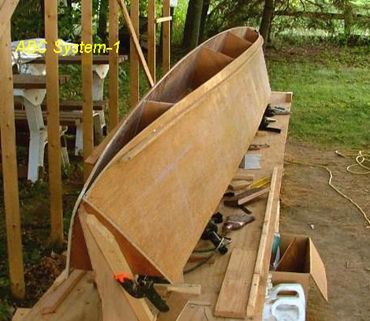
For the W17, the side panels of plywood are first laid around a few bulkheads and clamped to the stem and transom. To temporarily hold up a pre-scarphed
The ends of the side panel may need to be raised or lowered fractionally to make sure the ply lays flat against the bulkheads. If the longitudinal space between the bulkheads exceeds a certain dimension (related to the ply thickness – see here**), then a temporary bulkhead is added to assure the correct hull shape is achieved.
** I recommend the
With such relatively high spacing, the vertical spacing of stringers becomes important and I recommend not exceeding about 30% of the above bulkhead spacing (typically have 25% on the W17). Of course, how close one goes to the recommended minimum spacings will depend on the final design duty of the boat, such as 'ocean-going' or other such considerations, when bhd.spacing might need to drop significantly. For Amas that can be pushed 100% under, I would either close up the bhd. spacing a bit or bring the stringer spacing down to about 20% of the above bhd.spacing.
.
 Even with the above limit of spacing, you can still expect an unsupported free edge
Holding this temporarily with clamps, a few short tacks of hot glue are added between the batten and the plywood, with most tacks on the underside of the batten. The hot glue needs to be of good quality though (not the Dollar-Store variety ;) or it may be too weak.
With the plywood edge nicely stiffened, the upper edge of the side (boat being built upside down of course) can now be planed off to match the height of the bulkheads and to also be in a fair line from bow to stern. Once the plywood edge is a fair curve, the plywood is then given a BEVEL to the outside and this also helps to make sure that the plane does not hit and chip the bulkheads, as it might if the plane were held flat. The  epoxy would be squeezed or pushed out, leaving the joint dry and weak. (This is also explained in my boat manuals of course where this sketch shows how I recommend to cut back the edge of all intersecting ply where stringers pass ... to achieve greater joint strength from the epoxy)
It's worth noting that with the ABC System, the only joint that is fully completed while the boat is being built upside-down, is the underside of any stringer .., as this will be on top and accessible while building upside down. All the other inside joints are coved and finished only AFTER turning the boat over, when they are far more accessible. Prior to that, the boat is really only 'tack-welded' together with epoxy, so needs to be rotated with some care. ;)
The bottom panel is then laid on over the top and roughly marked to match the outside of the side ply. Then rough cut about 3mm outside this line.
The next step is to BOND. The upper beveled edge of the side (and any permanent bulkheads) is lightly pasted with epoxy resin filled with a dense filler powder like WEST System #404. At this stage only a very small amount of epoxy 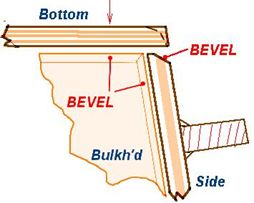 paste is needed … just enough to securely hold the joint together at the central point of contact. The bottom panel is then held down to the side panel edge with strips of strong duct tape - but not forced in any way. Just a full but light contact. If you pull down too hard, you risk to pull the side panel in towards the centerline and lose the fairness of the side panel. The epoxy paste will fill any small gap. A small ‘clean-up blade’ can be created from a thin hardwood ‘tongue-depressor’,
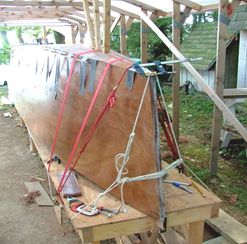
Once cured, the fairing batten is cut free from the hot glue with a sharp chisel and the outer edge of the bottom panel cleaned off flush with the side panel.
Once the tape is cured, the edges of the tape are faired into the plywood surface, before the whole hull is covered externally with a boat cloth … at least up to 50mm above the waterline.
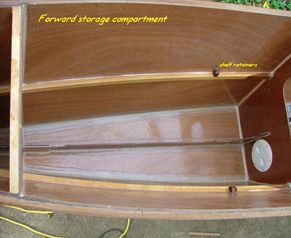 When the hull is turned over, the inside corner is filled with epoxy filler and a COVING created with a plastic or thin wood scraper with a 35mm minimum diam. tip*. Once cured and sanded, a 75mm tape is laid inside to complete the chine join, making a very clean interior with no ugly framing. For a stronger joint, overlapping two tapes at the throat of the coving is recommended.
* Useful to make tips of various radius .... ranging from a minimum of 5mm radius right up to 35mm radius for either very high strength joints, or those that are more open.
Bulkheads have the same coving but generally only need to be glass taped IF they are serving double-duty, say for the attachment of a main beam, a folding system, collision bulkhead or one with a chainplate attached.
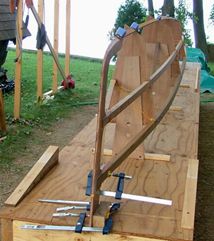
For the W17, the amas are built using the same ABC System and here are some pics showing the stiffening-fairing batten at the plywood edge, only needing to held in place with tacks of hot glue, mostly on underside.
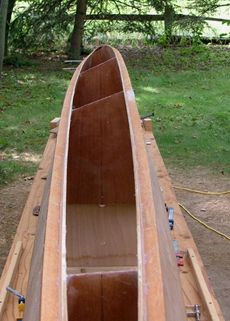
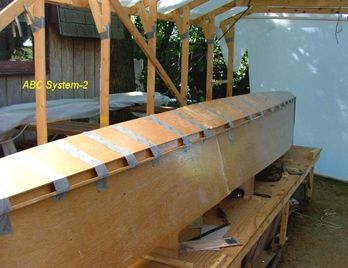
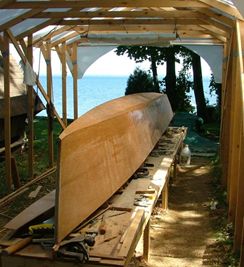
In both cases, the hulls turned out very fair with minimal interior framing and show a worthwhile saving in time, material, clutter & weight.
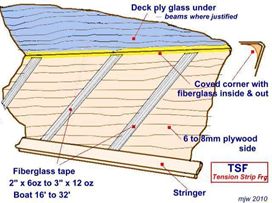 To stiffen the shell, I try to avoid wood frames** unless required for some other structural reason, preferring to stiffen the plywood internally with what I call ‘Tension Strip Framing’ (or TSF System), using vertical or near vertical UNI tapes as shown here in this sketch, or sometimes with tansion tapes laid diagonally from corner to corner. Laid flat on the inside surface, these tapes are relatively light, take little space, and cause no added finishing or paint work, so are what I would call, 'good value'.
With the same approach, one can also apply surface stiffeners that reduce flat panel buckling without adding hard spots or rigid framing, particularly on small boats. Here's an example used on my W-Scow design (also using the ABC System), where both the boat and tank sides only need some flat stiffeners to enhance 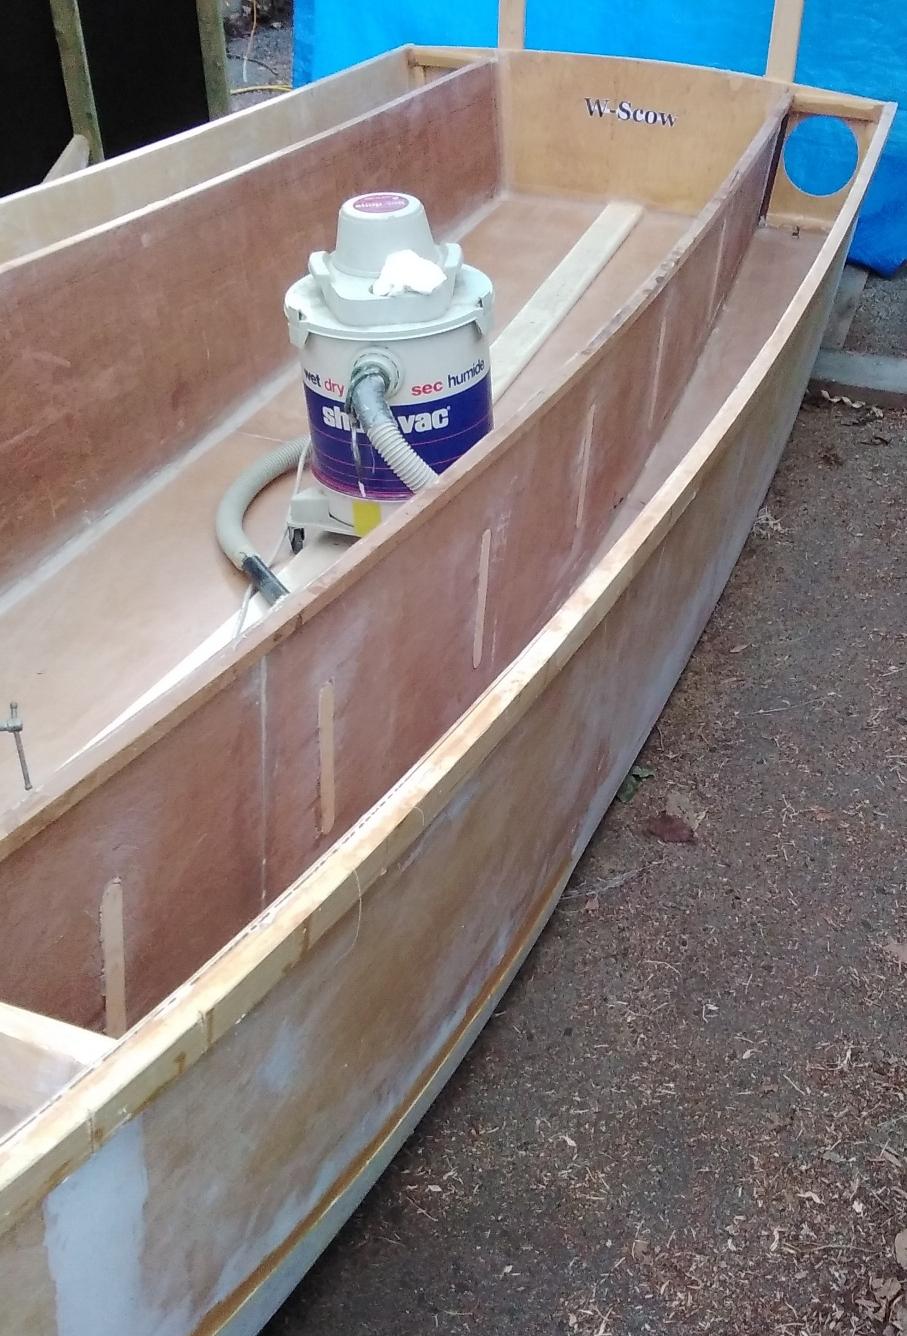 the vertical strength. The curved plywood, although only 4mm thick is theoretically very strong as the vertical web of what will be a box, but still, they could buckle along the grain with any central side pressure. But by adding 200 x 25 hardwood 'tongue depressers' every 300 mm and encasing them in glass, the buckling risk is sufficiently lowered with little weight increase, no hard spots, and a super-clean tank interior for both zero maintenance and easy stowage for sails or oars through the transom hatches.
[See Other Designs, for more info on the W-Scow if interested)
** Wood frames, while occasionally necessary, not only clutter the interior making it harder to
Numerous hulls have since been built using this system and I’ve received no negatives to date.
It’s interesting to compare the interior structure chosen by designers of other somewhat similar hulls. Some still use the rugged ‘old-style’ structure with wood chines and internal framing but from my perhaps biased 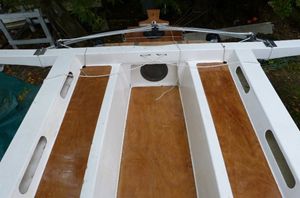
Compare such cockpits with internal gunwale rails, exposed framing
Some designs, (the Strike being just one), still use 'the tried and true' interior framing system (see Construction Method #1) but personally, I now consider this method to be heavy, space consuming and hard-to-maintain, compared to cleaner, modern ones made possible initially by the development of WEST epoxy and their fillers. By comparison, for the Seaclipper amas the designer
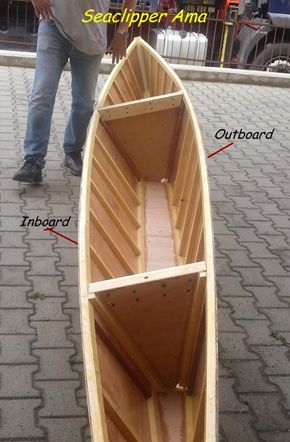 While neither approach is the way I'd personally choose to frame such boats for minimum work and weight, one cannot argue with their strength and the Seaclipper approach is certainly original.
But many years ago now, the Gougeon Brothers tested and proved that plywood could be joined together with only fillets of
The ABC construction system uses that knowledge and experience to advantage.
 The
The
For that reason, bulkhead spacing needs to be closer than for the main hull and the W17 uses a mid-depth longitudinal stringer of mahogany with more plywood bulkheads to achieve the required strength, but still with less work and lower maintenance than with older methods using wood chines and bulkhead blocking.
So for hulls of similar format, perhaps consider the 'Simple as ABC System' next time ;-)
Mike 2018
Your comments are welcome and can only help to make better boats in the future, either with plywood or other competitive panel materials that occasionally come on the market.
"See the Copyright Information & Legal Disclaimer page for copyright info and use of ANY part of this text or article"