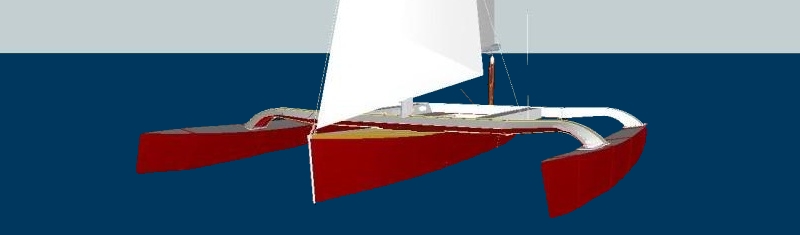


Handling the W17 trimaran ashore ….
By now many readers will know how handling the W17 is when on the water, but what about ashore? With time, one gets familiar with your particular boat and that’s especially useful when needing to rig it or handle parts ashore for maintenance. Initially, the 14ft beam may seem a little intimidating, but the parts are easy to handle with a few tips, even if alone.
Access for Maintenance
Whether you’re sanding, painting, or just adding trapeze strips to the side of the amas, it’s much easier to simply pull out the attachment pins to lift off the ama and stand it up on the beams with a prop under the ama itself. Lifting off can be done by one person by first removing the hinge pin before removing the lower latch pin …. keeping in mind that the latches may only bend down about 45 degrees. But that’s more than enough to lower the ama on to a couple of stools or saw horses. From there, it’s easy to pull the latch pins and lift it away. You just need a prop for each ama, made as shown in the photo insert.


You also do not need to be concerned about rolling the main hull on to the main beams if you need access underneath. Just put something soft under the latches where they hit the ground. If the main hull is on the trailer, you can rotate it even more and this gives good access for bottom repair and painting. Quite easy to do singlehanded, but first place some wood and foam under the bottom chine. Remember though, if you have vertical locating struts up forward to keep the bow central on the trailer, you’ll need to lower these before you rotate the hull, or you risk to break one or even stick it through the hull side!
Unfolding the boat
On the trailer, the mast spreaders will appear to prevent the amas from being unfolded, but there’s a simple way to solve that. Things just need to be done in the right order.
Let’s first take the boat all packed up on the trailer. The amas are folded and the mast is stored in place on the centerline. So now we want to rig the boat for sailing.
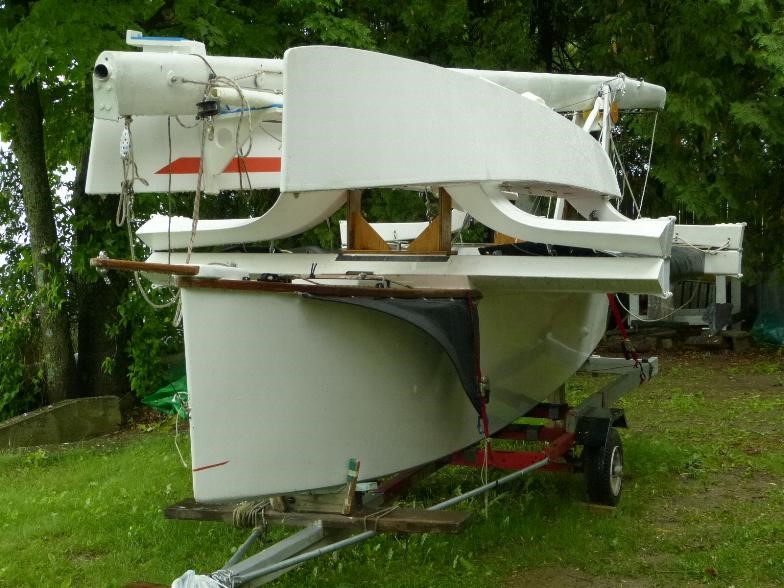

With the trailer straps still holding the main hull, we need to move the forward end of the mast up over the starboard ama, far enough that the port ama can be lifted up with enough clearance from the mast spreader. Although one can manage this by throwing a lifejacket over the std. ama bow to support the mast, the best and neatest way is to make up a little frame as shown on this photo. This just drops over the std ama bow and has two ‘shelf-brackets’ built on it. One high one, outboard of the ama, and a lower one inboard, on which the mast will rest while trailing on the highway (see photo). Then, to unfold the port ama, you simple lift up the mast and place it on the high, outboard bracket and then, the unfolding port ama will clear the spreader. Always use two people to unfold each ama … with the tallest person at the forward end. All the weight is on the hinge pins when it’s high up, so there’s little load at that point … just make sure you don’t let it slip in your hands and have it fall down either way ! Slipping on rubber or vinyl gloves first can definitely help if you’re unsure, and then you’ll have full control.
Once the port ama is folded out, the center of gravity is now off center, so you’ll need a prop under that ama to stop the boat from trying to rotate off the trailer. Best to make a permanent one with the correct ‘Vee’ in the top … and bond on some firm foam to be kind to your paintwork. MARK the side of the prop with the lowest leg of the Vee with "OUTBOARD" so you always place it correctly. (Remember to first slip-in the latch bolts to lock the folding system though).
Now lift the mast off the high bracket and bring it to rest (over a piece of carpet, lifejacket or foam) on the other side of the forward main beam … just outboard of the main hull, on the port side. Then lift off the mast carrying bracket and then unfold the starboard ama in the same manner. This one will not need a prop (unless you plan to work on the boat), as now, the center of gravity is back on the centerline.
From this position, you can move the mast back towards the centerline and push it towards the stern, with the weight on the roller of the aft crutch.
Mast Raising / Lowering
Good to have one of those sturdy plastic foot-stools now, as you’ll need to climb-up to bolt on the temporary shoe for mast raising … and to install the pivot bolt. But first, make sure the trailer is supported BOTH ends, and the boat supported both sides, so that it cannot tip either way as you move around. Tighten the shoe bolts so there’s no slack, but do not overtight. After all, the studs are just in epoxy and you want to retain their fit for many years. (You’ll find it beneficial for long life, to bond a stainless steel ‘helicoil’ deep into each hole, as such threads last longer than in epoxy, when the bolt is often removed).
Then rig the gin-pole to the mast, with a topping lift and side stays that all just snap-on in place, with no adjustments required once you’ve got the lengths right the first time. A little slack is no problem. To keep the mast central, you can either snap on two short strops to the rings spliced into the bottom of each shroud, and snap these temporarily to two brackets bolted to the beams (as detailed in the Build Manual), or you can use a lanyard from trapeze wires if you have them installed ... a little quicker to do.
For lowering there are 2 options. If you’re without a trailer or winch, rig a dedicated 4:1 tackle, between a strong eyebolt on the end of the gin pole and the forward eye on the bowsprit. Then snap-shackle the spinnaker halyard to a matching eye on the opposite face of the gin pole, and prepare to haul up the mast. IF there’s a trailer winch, it’s generally a time saver to use this …. snapping the wirehook directly to the lower eye of the ginpole.

As the mast is already higher at the stern, it’s not too hard, though the highest effort IS at the start. Lowering the trailer tongue to the ground can help if alone … but if someone tall is around, ask them to simply give a little lift to the mast near the aft roller, standing on the foot stool mentioned earlier. This just makes the beginning lift less stress on everything. After that, it gets easier and easier. But when it’s about 20 degrees from the vertical, stop and check if you’ve snapped on the main halyard to the centralized traveler and also securely cleated the halyard to the mast. (This line serves as a backup to prevent the mast from potentially crashing down forward. Depending how your shrouds are tensioned, they may also serve to prevent that. You’ll no doubt have to overtighten the main halyard the very first time you raise the mast, but once you know the preferred position, permanently mark the halyard at the cleat and you’ll be set for all future mast raisings). Once up, take the side load on the real shrouds and adjust tension with the aft bridle lines. Again, some markings on the lines will help set the mast quickly and accurately each time. About 450mm aft rake seems to work well – and of course, check that it’s vertical athwartship. All that remains is to re-tension the trampolines that needed to be slackened off about 150mm in order for the amas to fold in. The mast raising operation itself can be done in about 10 minutes once the lines are organized. The tramps generally take longer. It’s always fun rigging a boat, with all the anticipation of what’s just ahead, but make sure you systematically check things as you go.
Lowering the mast is even easier and just the reverse of the above. Put a couple of straps around the main hull to the trailer before doing anything.
When folding-in the amas, remember to block up under the PORT ama and fold in the starboard one first, after first slackening off the trampolines at least 150mm and releasing the attachment to the beams. The mast can then be placed on the high bracket of the special ‘Vee’ rack, so that the spreaders are clear to fold in the Port ama. Once both amas are folded in, bring the mast down to the central bracket and lash in place.
If you’re driving any distance, make sure all wires, ropes, mast and sails are well attached with shockcords. Also, remove the forward spray nets as they will flap and damage your paint work if you go much over 30 mph (50 kph). Tighten up the hull retaining straps firmly, but not brutally !
You’ll soon be ready to haul away. Recommend to check the ropes and straps after 15 minutes or so, and then about every hour on the road.
‘Dry sailing’
Another ‘handling’ operation ashore, is hauling the boat up dry for overnight storage. If this is only an occasional thing, then rolling on inflatable tubes or sliding up on PVC pipes have both worked as the boat is flat-bottomed. If you have the space for a ramp, you can make a trough of treated wood as shown here, just 1-2cm wider than the max beam of the main hull and lined with carpet. If you then fit this with 4 axles, 8 plastic wheels and plain nylon bearings, you can roll this into about 14” (350) of water and then float your W17 up inside your ‘floating dock’.
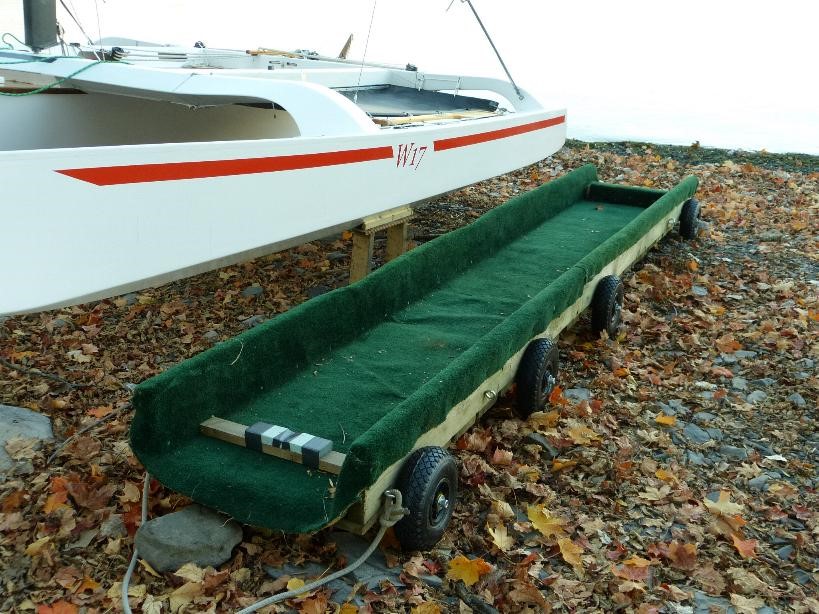
Once in place, position a short 4”x 4” (100 x 100) block under the stern bulkhead to share the keel load and then haul the whole dock (with the boat on it) up the ramp with tackle or winch.
Another haul-out option is an aluminum Boat Lift. These are great in non-tidal waters such as a large lake. Although normally designed for motor boats, those without posts at the entry end can be modified or built to suit a W17 trimaran. On the lift shown, two 12ft lengths of 2” x 8” treated planks (with carpet) have been bolted on the cross beams of the lifting frame and two triangulated supports added to carry some weight under the main beam on either side of the boat, just inboard of the hinge and latch. Such a boat lift (unloaded) can easily be dragged into deeper water as the level drops, or pulled higher as it comes up.


Once cranked up, lash the boat to the lift with a couple of lines from the front beam in case a big wave tries to lift the boat off when you’re not around. Despite being 18” above the water, it happened to me once so a lesson learned!
Plans to build such a platform, may be available from Small Trimaran Design.
"See the Copyright Information & Legal Disclaimer page for copyright info and use of ANY part of this text or article"